

Introduction:
In this blog, we will learn how to create a resource group in the Azure Portal.
Pre-requisites:
1. A user with a Contributor role in Azure Subscription.
2. Click here to learn how to assign a role to the user.
Description:
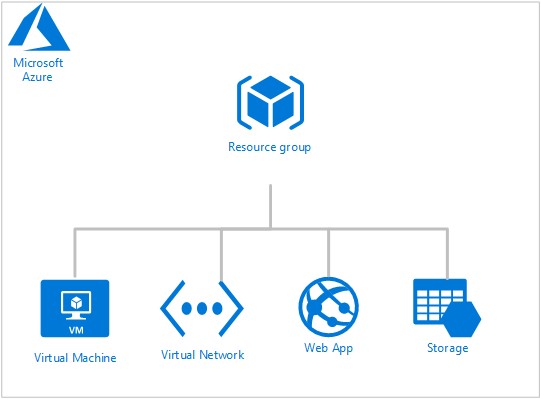
A resource group is a logical container into which Azure resources like web apps, VM’s, and storage accounts are deployed and managed.
The resource group includes those resources that you want to manage as a group.
Steps:
1. Login to Azure Portal https://portal.azure.com.
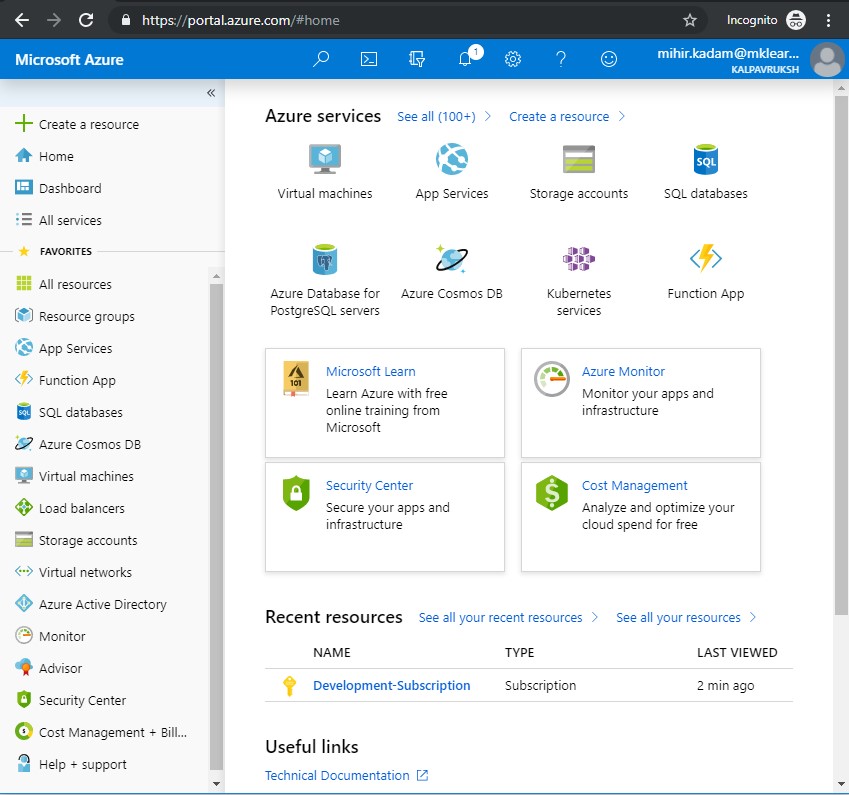
Figure 1 : Azure Portal
2. In the left pane, select the Resource groups then click on + button to create a new Resource Group (see Figure 2).
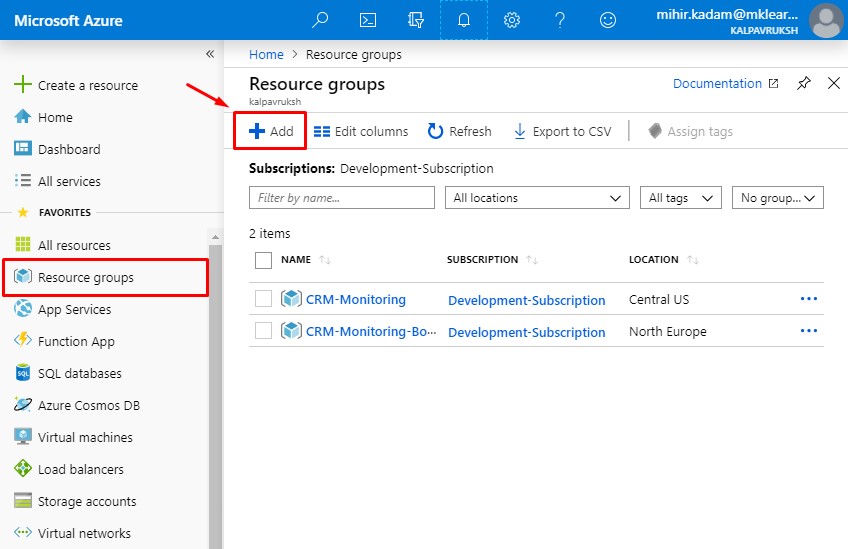
Figure 2 : Resource Group
3. Provide a resource name and region.
If you have multiple subscriptions, then select an appropriate subscription from the dropdown menu.
Enter the meaningful name for the resource group. Example: Your project name.
Specify a location where the majority of your resources will reside. Typically, select the location that is closest to your physical location.
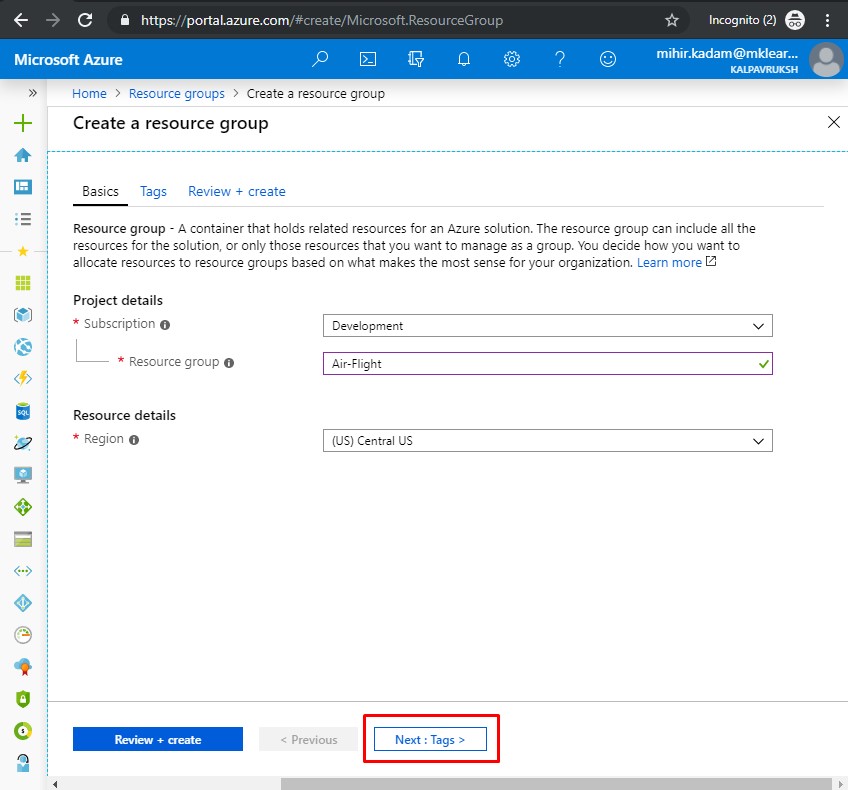
Figure 3 : Create Resource Group Blade
4. Provide a Tag name.
Tags provide a way to logically organize resources with properties that you define. Tags can be applied to resource groups or resources directly.
Example: Resource group for Development Purpose.
Click here to learn more about tags.
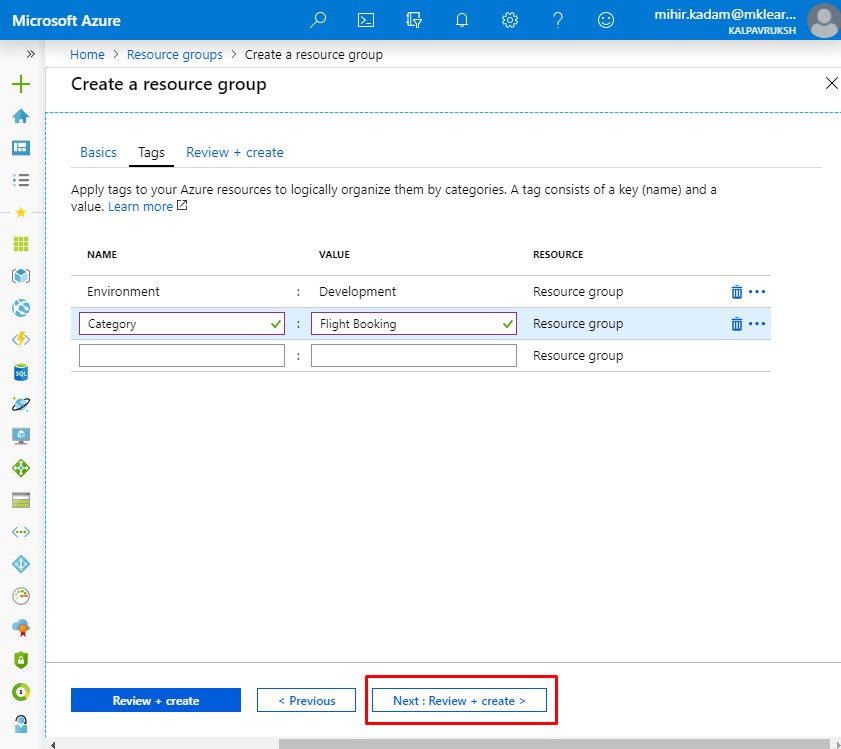
Figure 4 : Create Resource Group Blade
5. Review and create a resource group
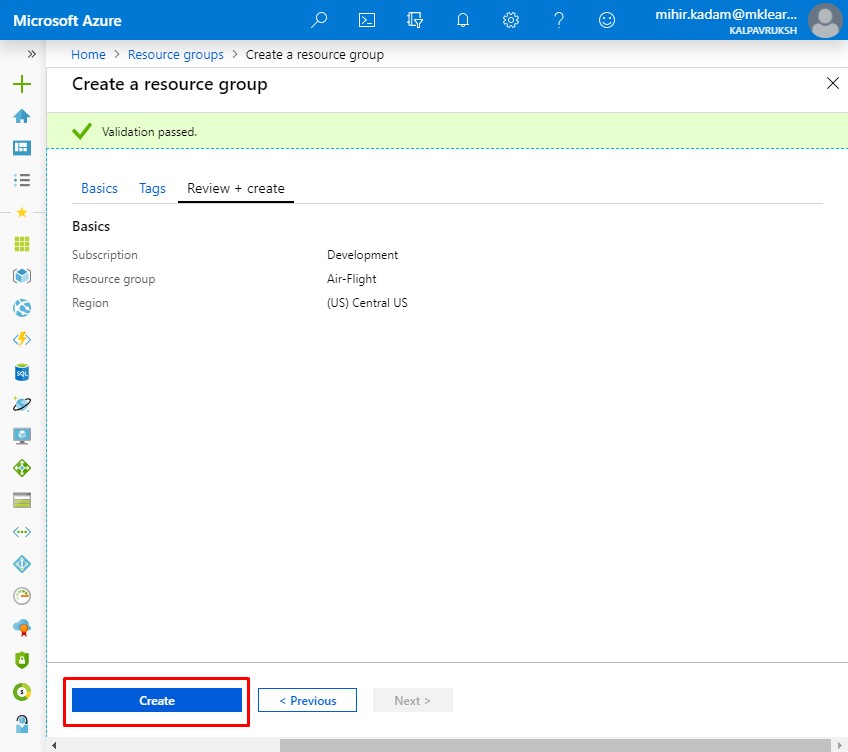
Click on Create button to provision the resource group.
The resource group might take a few seconds to create. Once it is created, you see the resource group on the Azure portal.
6. To view the recently created resource group.
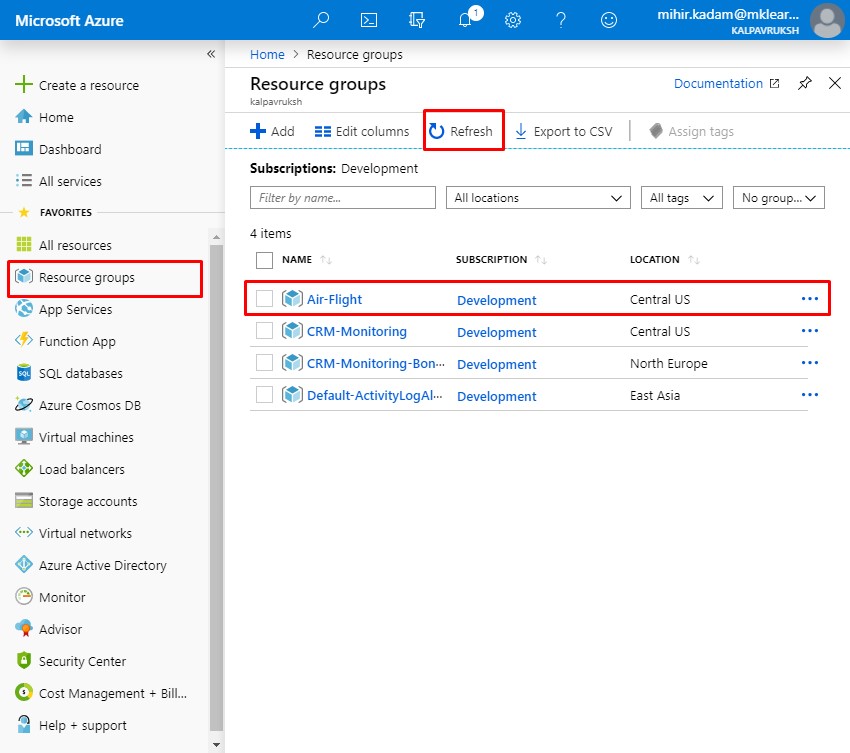
We have successfully created a resource group in Azure.
References:
https://docs.microsoft.com/en-us/azure/azure-resource-manager/resource-group-overview
https://docs.microsoft.com/en-in/azure/active-directory/fundamentals/active-directory-how-subscriptions-associated-directory
https://docs.microsoft.com/en-in/azure/azure-resource-manager/resource-group-using-tags