
Introduction:
In this blog, we will learn how to connect Azure Data Lake with Databricks.
Pre-requisites:
1. A user with a Contributor role in Azure Subscription.
2. Azure data lake storage account.
Problem Statement:
We have a data store in Azure data lake in the CSV format and want to perform the analysis using Databricks service.
Steps:
1. Register an Azure AD Application.
2. Assign a Contributor role and Storage Blob Data Contributor to a registered application. Link Here. An only account administrator can assign a role.
3. Create an Azure Databricks resource.
4. In the Databricks, perform the below steps
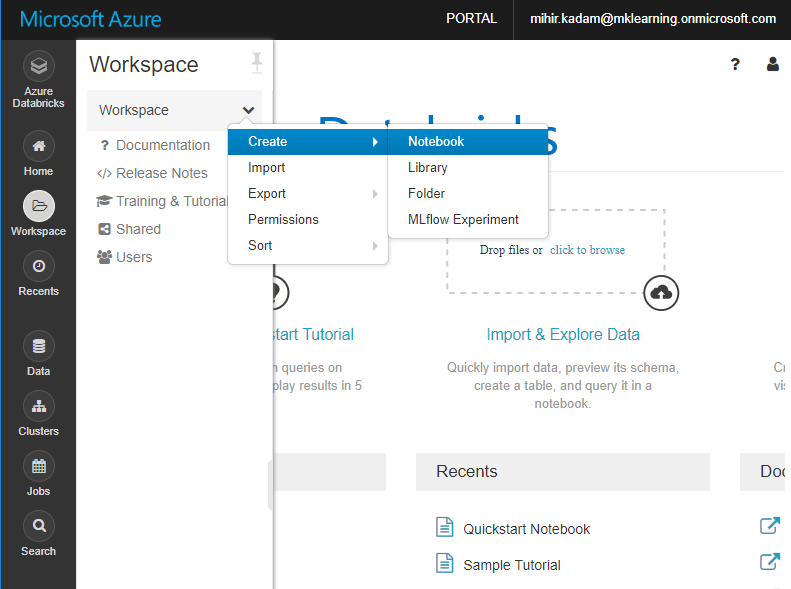
In the left pane, select the Workspace. From the Workspace drop-down, select Create > Notebook.
5. In the Create Notebook dialog box, enter a name for the notebook. Select Scala as the language, and then select the Spark cluster that you created earlier.
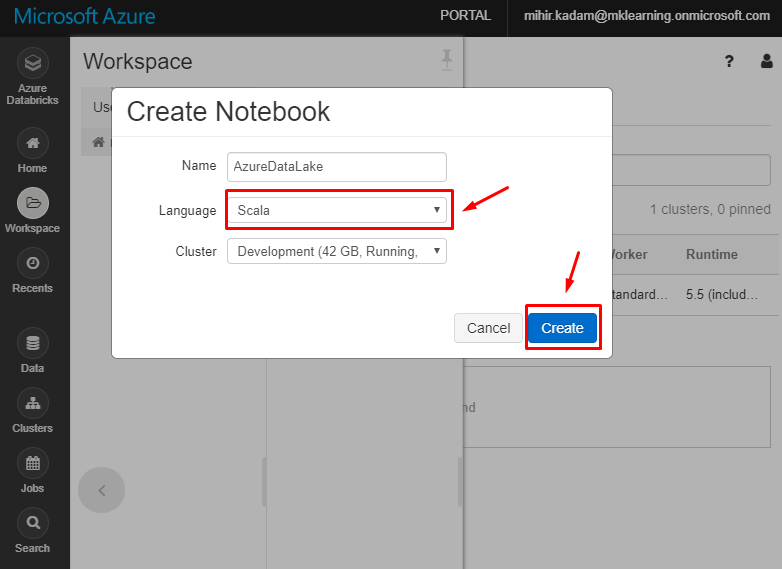
Select Create.
6. It will preset a blank notebook for you.

Run the below code:
val configs = Map( "fs.azure.account.auth.type" -> "OAuth", "fs.azure.account.oauth.provider.type" -> "org.apache.hadoop.fs.azurebfs.oauth2.ClientCredsTokenProvider", "fs.azure.account.oauth2.client.id" -> "", "fs.azure.account.oauth2.client.secret" -> " ", "fs.azure.account.oauth2.client.endpoint" -> "https://login.microsoftonline.com/ /oauth2/token")
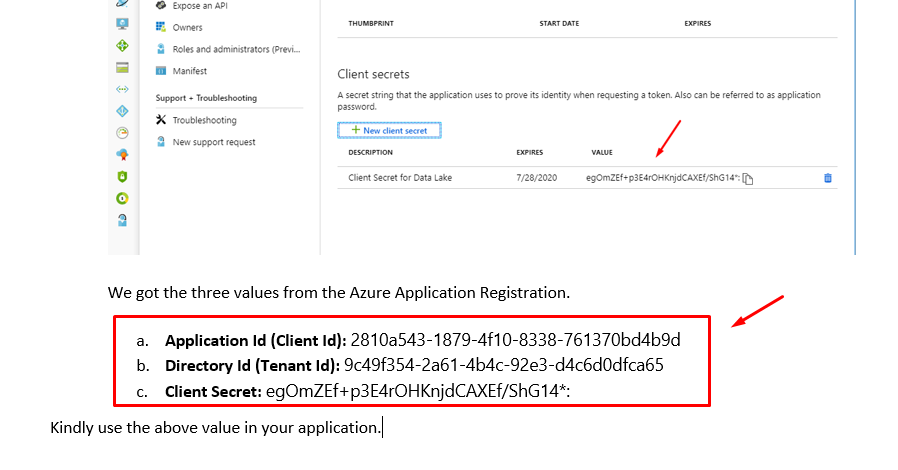
Please replace application-id, client-secret and tenant-id values.
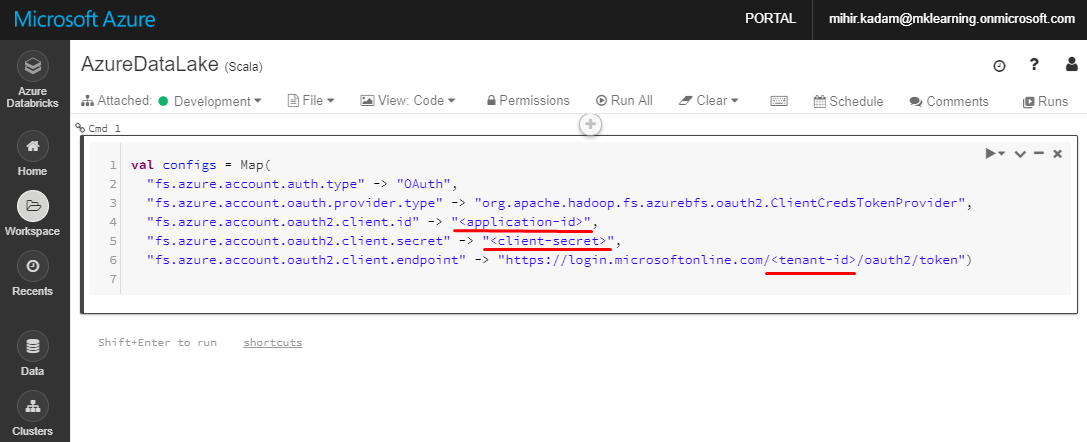
Kindly get the values from Register an Azure AD Application.
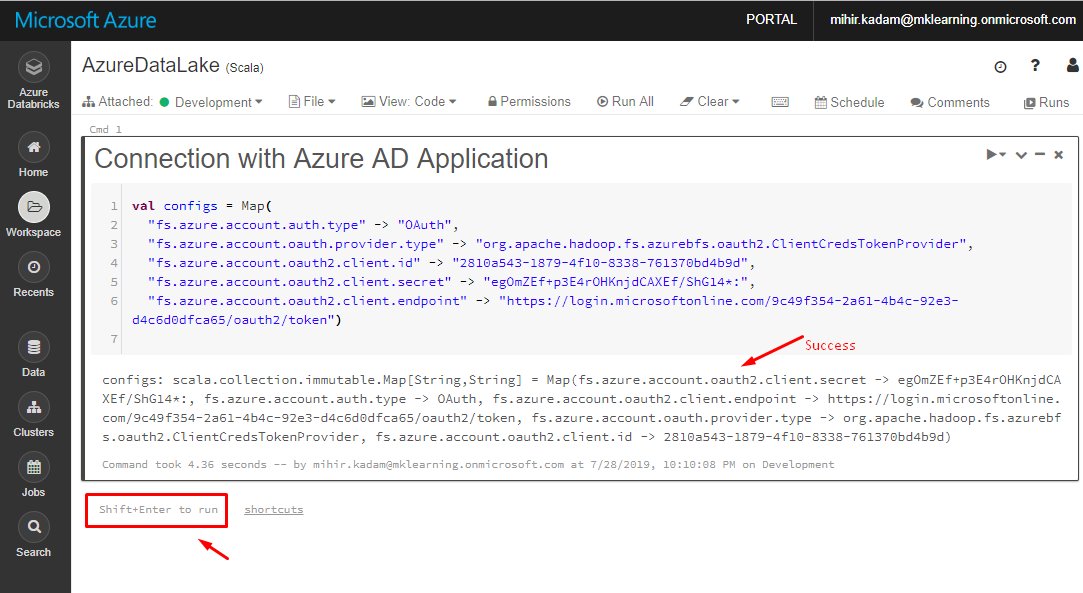
7. Insert a new Call and run the below code.
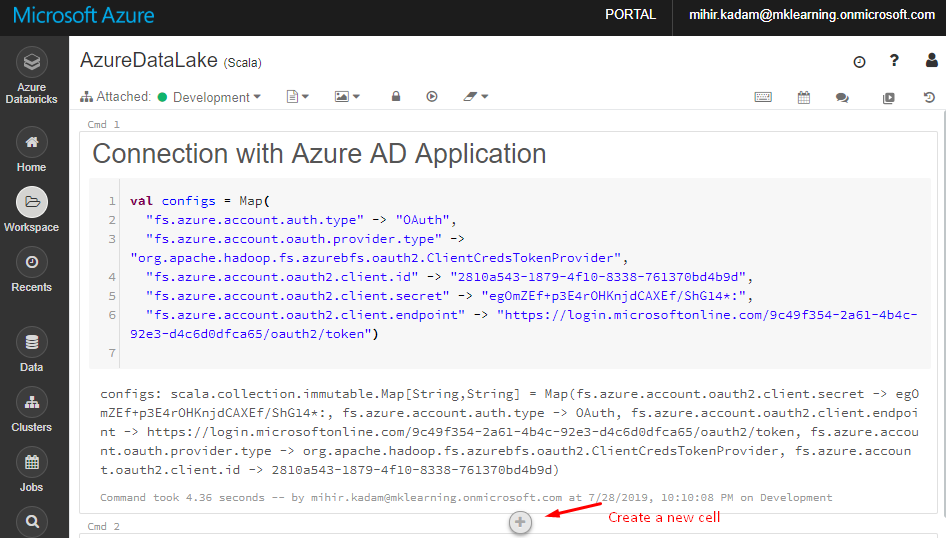
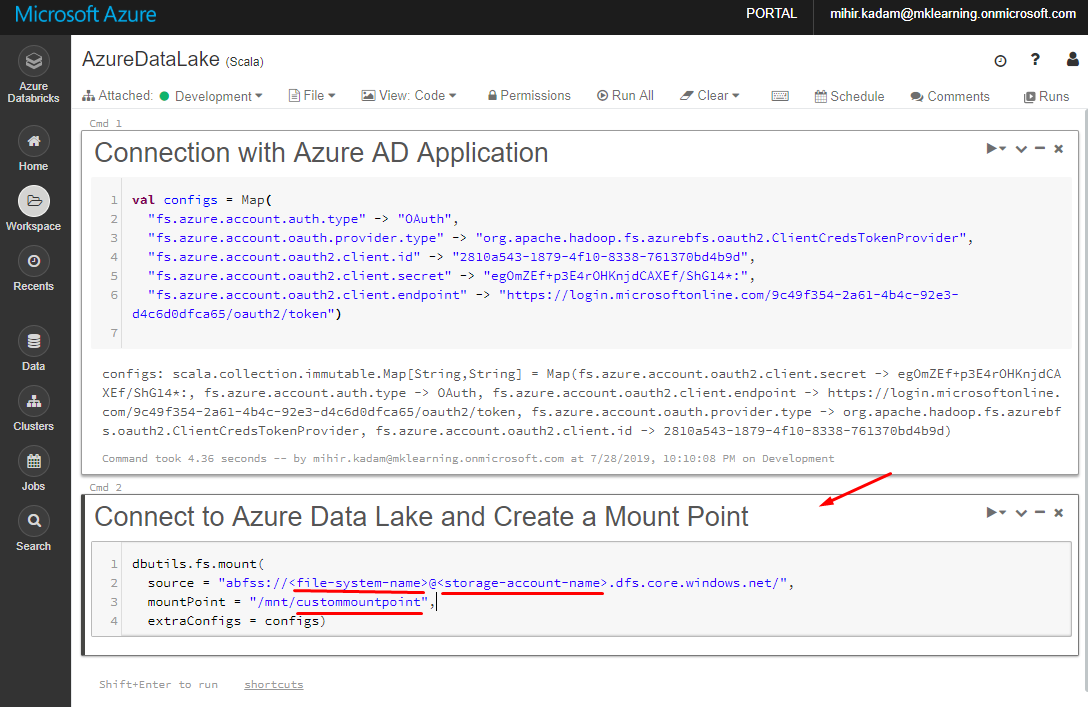
This will Connect Databricks to Azure Data Lake.
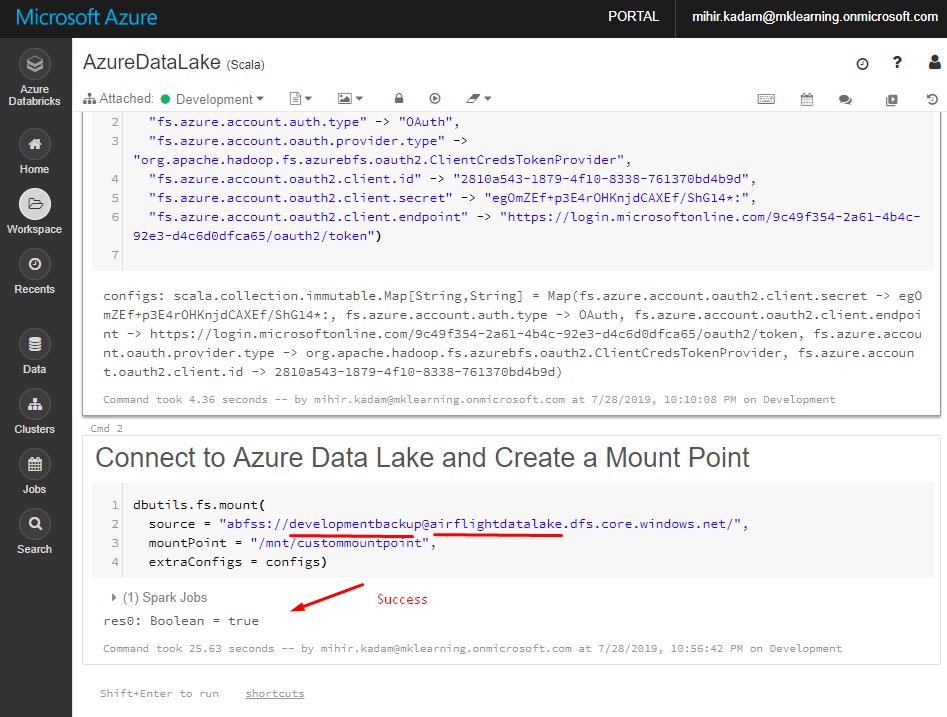
dbutils.fs.mount( source = "abfss://@ .dfs.core.windows.net/", mountPoint = "/mnt/custommountpoint", extraConfigs = configs)
Kindly replace file-system-name and data-lake-storage-name with the actual values
storage-account-name: Name of the storage account.
file-system-name: Name of the container or file system
custommountpoint: any meaningful name
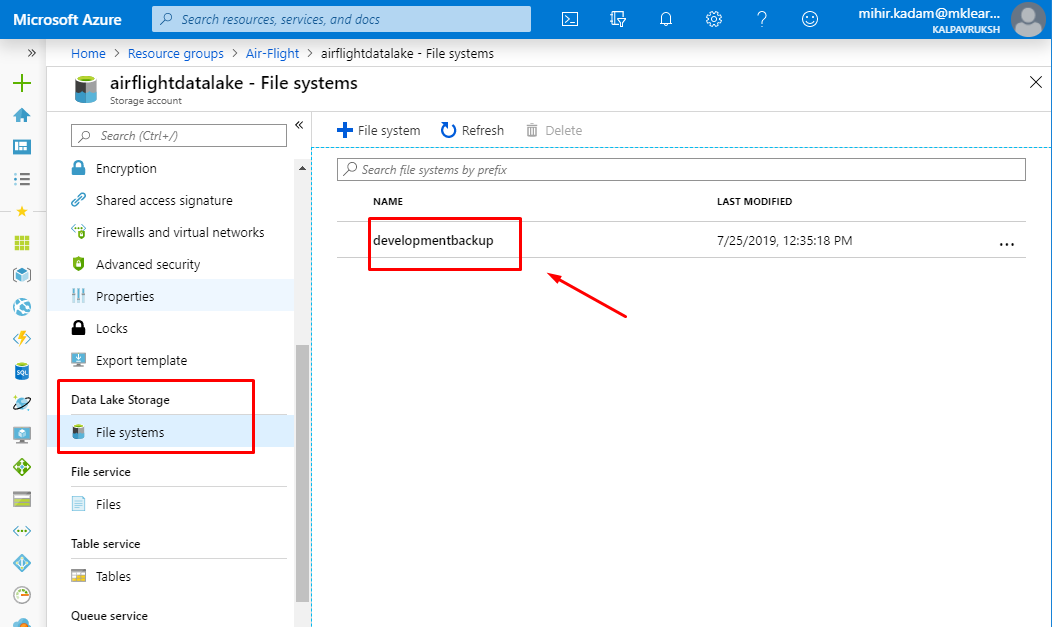
Please find the below screen capture, how to get a storage account name & file system name.
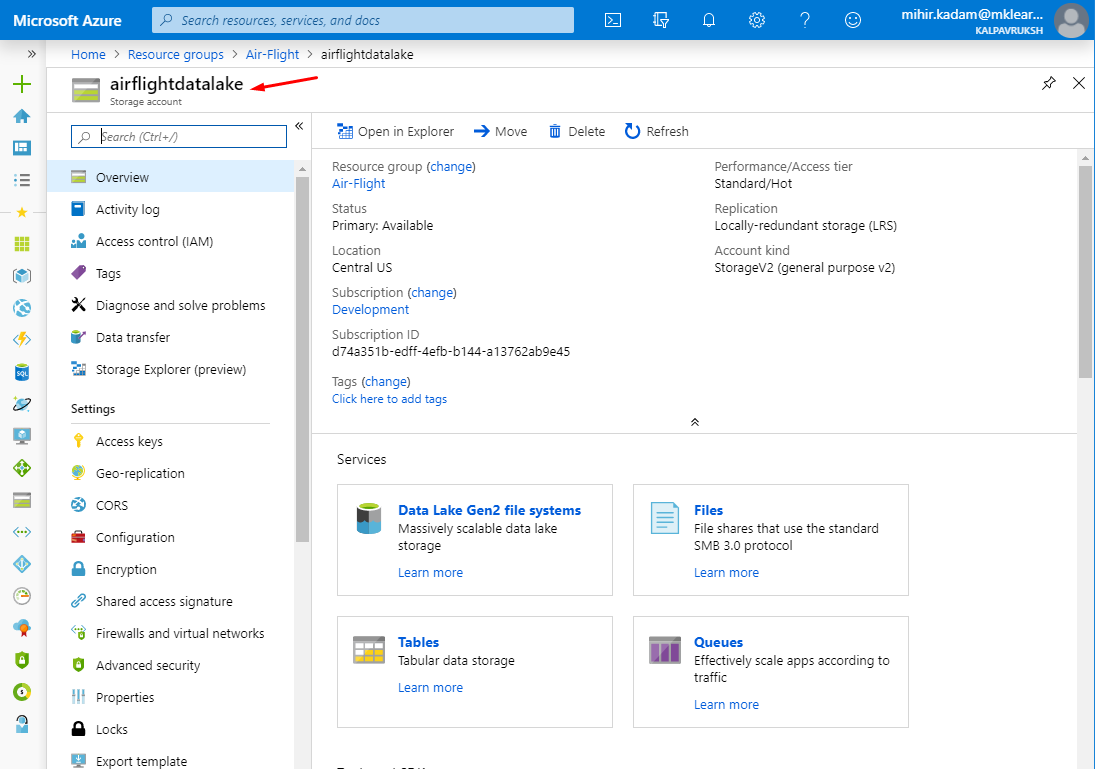
File system name
Select the block and hit Shift + Enter to execute the code.
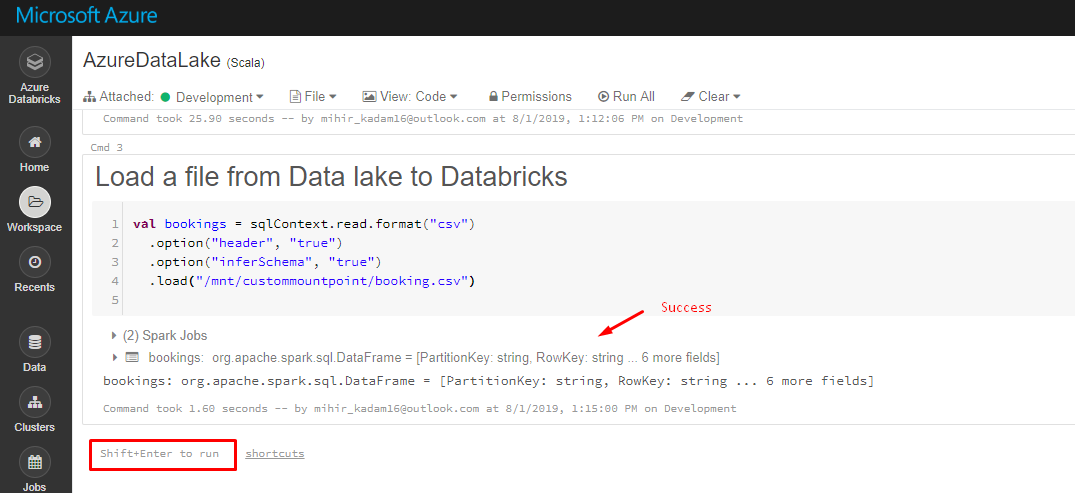
8. Create a new Cell and run the below code.
val bookings = sqlContext.read.format("csv")
.option("header", "true")
.option("inferSchema", "true")
.load("/mnt/custommountpoint/ ")
Replace the file-name value with the actual name.
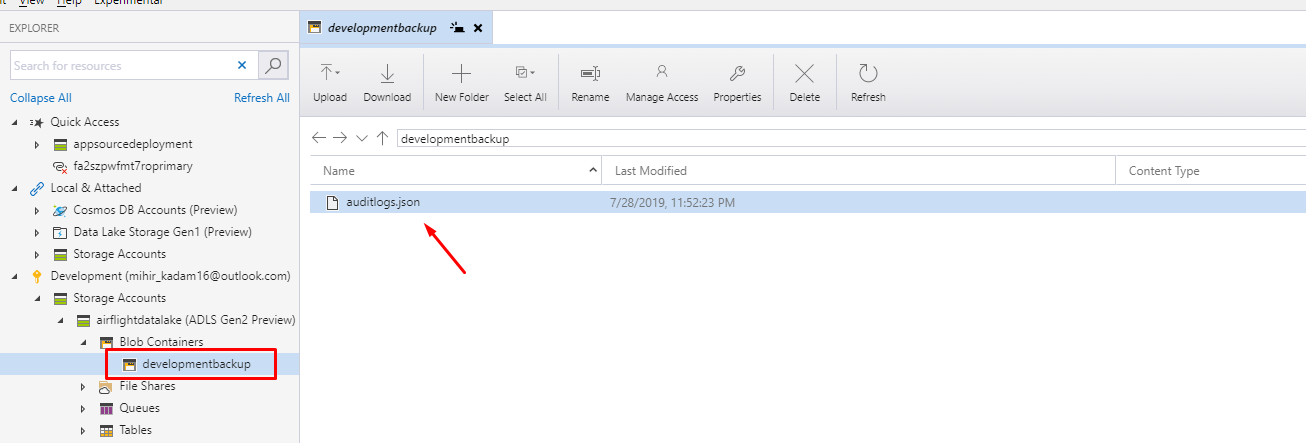
Our data is stored in CSV format.
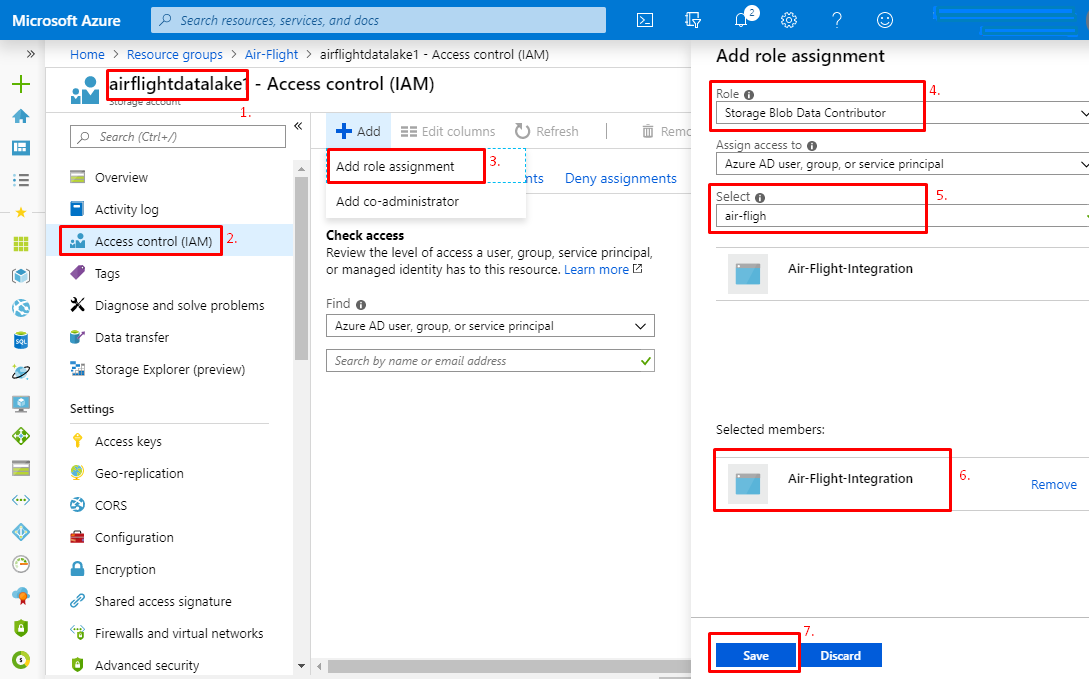
Note: If you have received the following error then assign a Storage Blob Data Contributor role to the Application at Data Lake resource level.
StatusCode=403 StatusDescription=This request is not authorized to perform this operation using this permission.
Storage Account (Data Lake)> Access Control (IAM) > Assign a Role > Storage Blob Data Contributor.
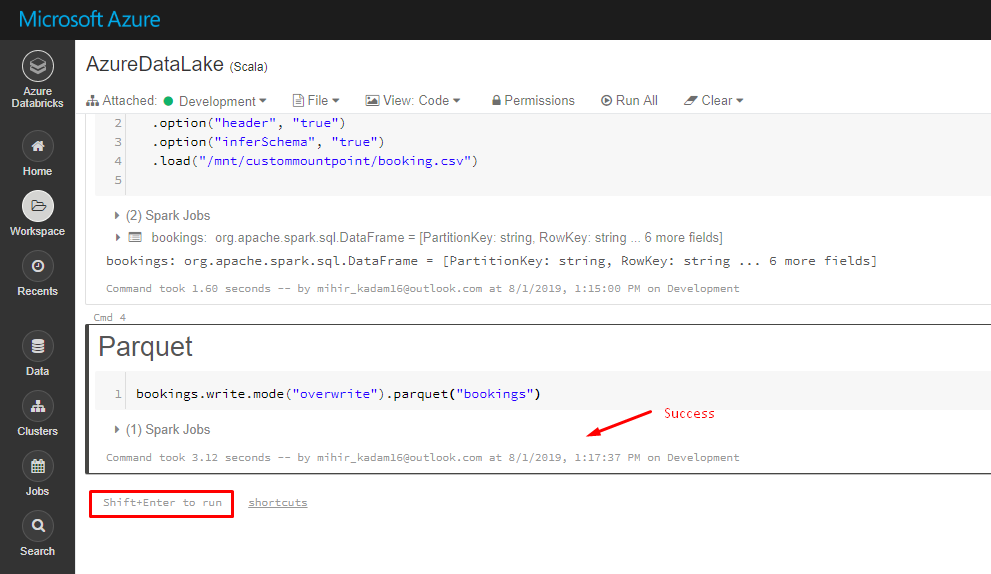
9. Next step is to parquet the data.
Kindly enter the below code into a new Cell and hit Shift + Enter to execute the code.
Code:
bookings.write.mode("overwrite").parquet("bookings")
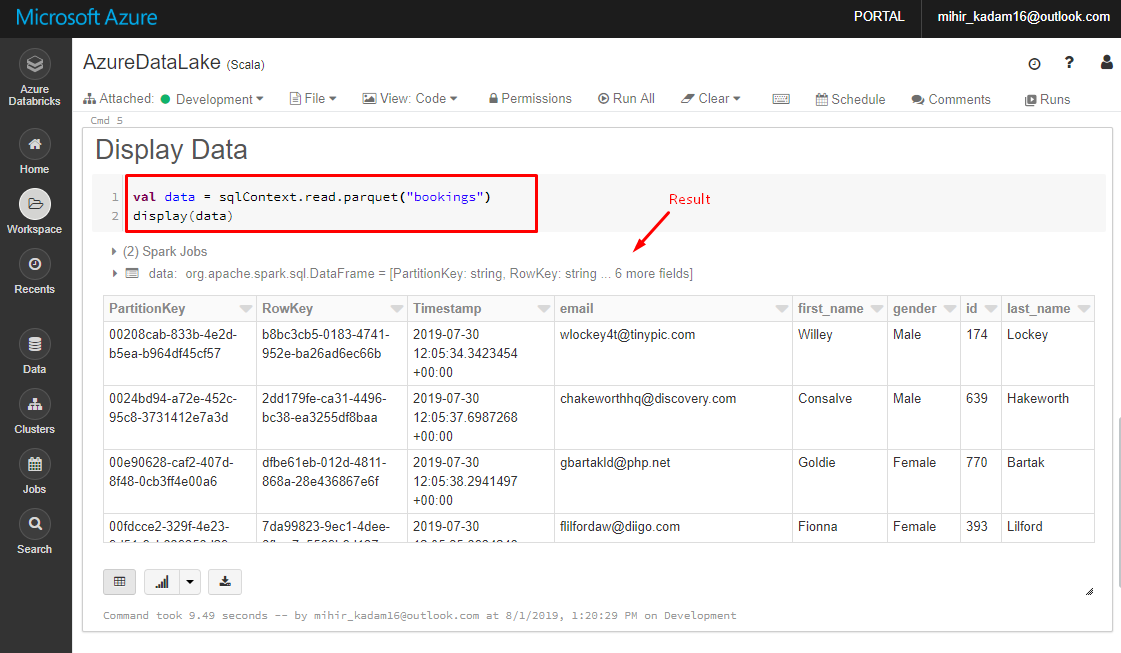
10. Read and Display the data in UI.
Kindly enter the below code into a new Cell and hit Shift + Enter to execute the code.
val data = sqlContext.read.parquet("bookings")
display(data)
You can execute many SQL commands against data to generate a report.
https://docs.databricks.com/spark/latest/spark-sql/index.html
Reference:
https://docs.databricks.com/spark/latest/spark-sql/index.html
https://docs.databricks.com/spark/latest/data-sources/azure/azure-datalake-gen2.html
https://github.com/MicrosoftDocs/azure-docs/blob/master/articles/storage/blobs/data-lake-storage-use-databricks-spark.md


