Introduction:
In this blog, we will learn how to create a table storage account and insert data using a CSV file.
Pre-requisites:
A user with a Contributor role in Azure Subscription.
Description:
Table storage allows you to store the data in a simple tabular format. It’s a cost-effective way to store the data.
Modules:
1. Setup
2. Sample CSV Import
3. Connection String
Let’s understand the module one by one.
How to Setup Storage Account?
1. Login to Azure Portal.

2. Create a New Resource Group or use the Existing Resource Group.
3. On the Left Panel, click on + Create a Resource.

4. In the Search Window, Type Storage Account. Click on Storage Account Icon to create a new service.
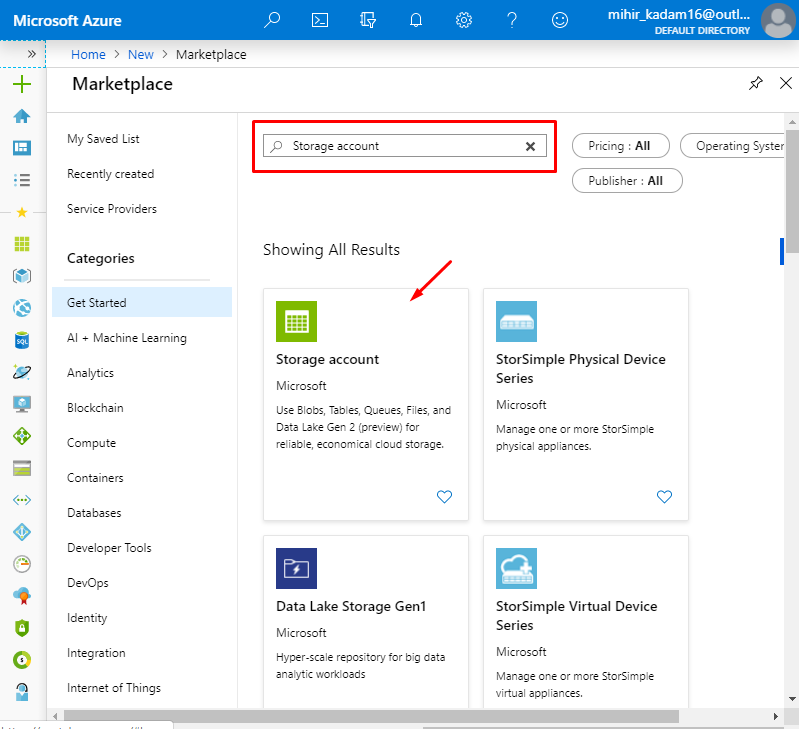
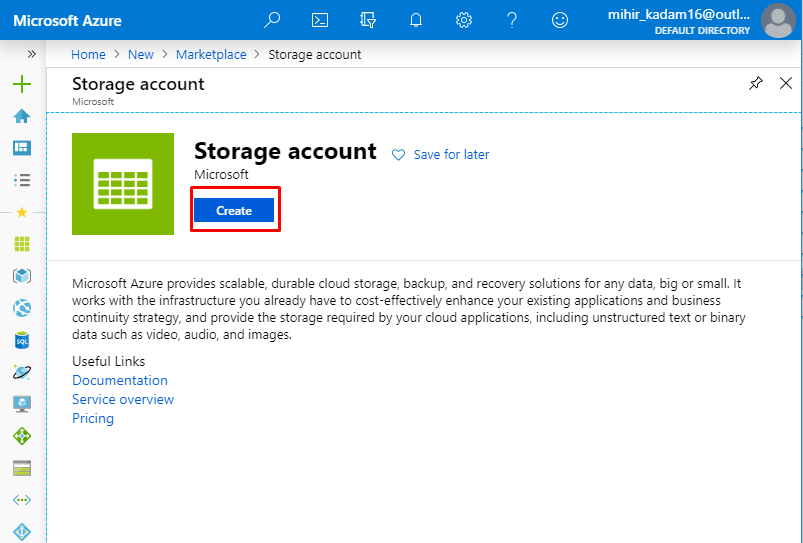
5. Click on Create Button.
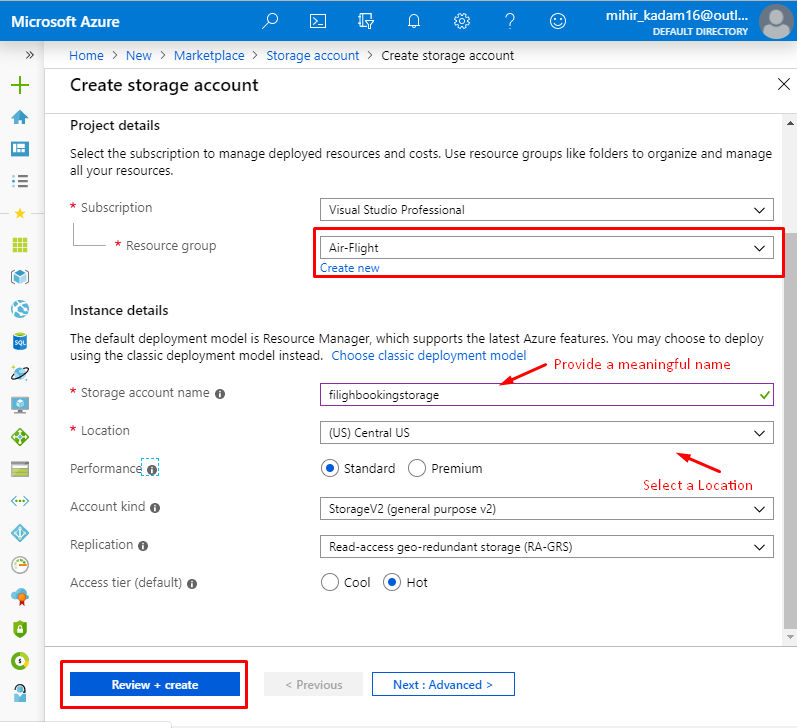
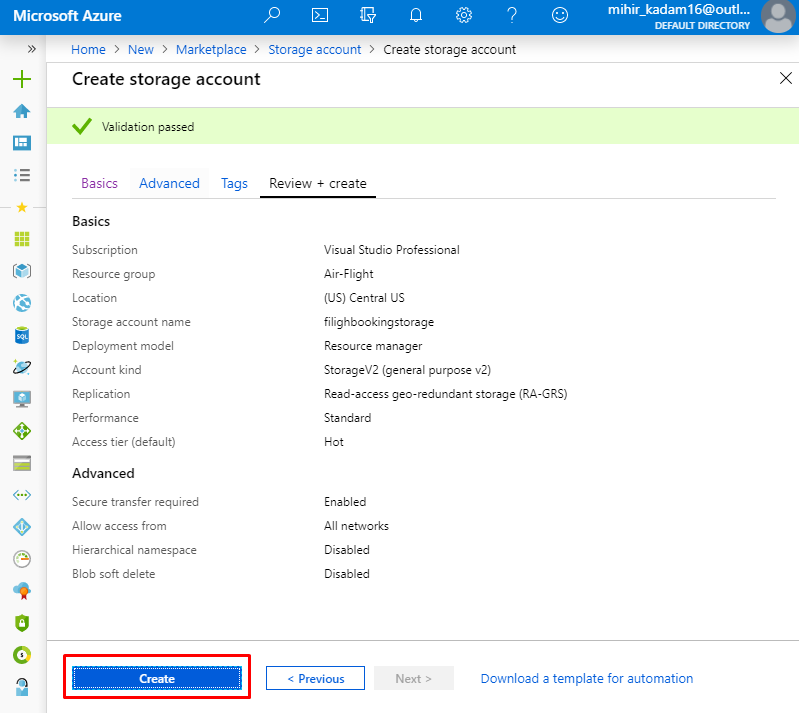
6. Enter the basic details and Click on Review + Create button.
After the validation is complete, select Create to create the account.
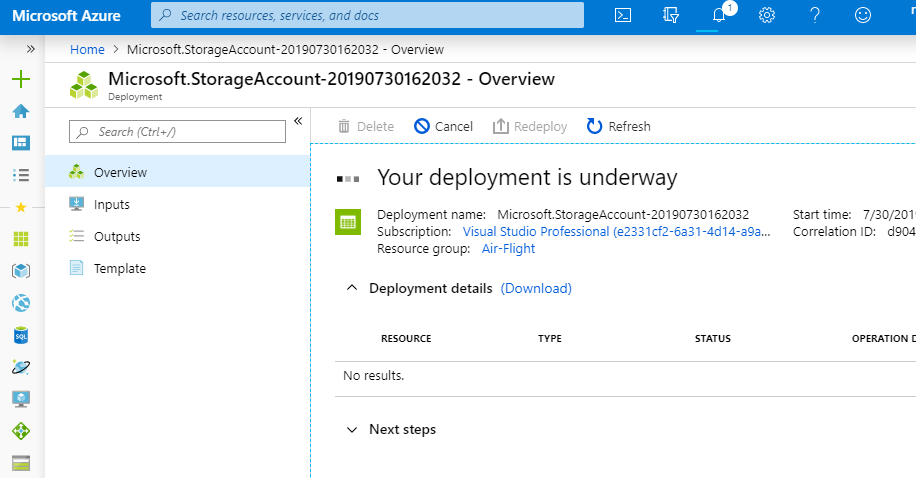
It takes a few minutes to create the account. You’ll see a message that states Your deployment is underway.
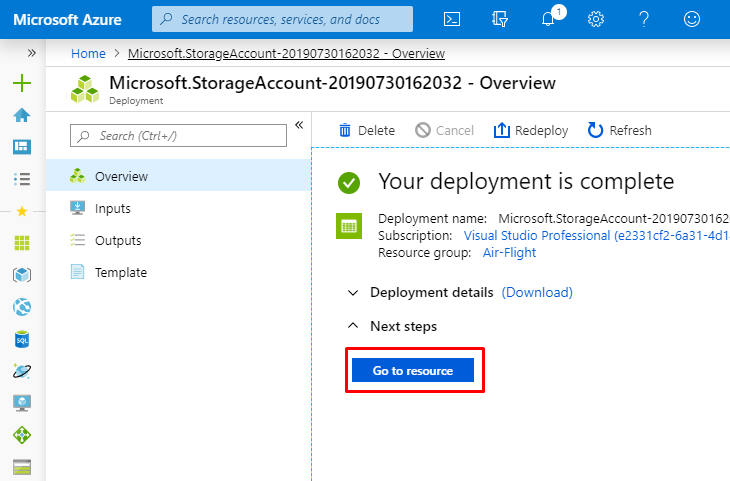
Click on Go to Resource.
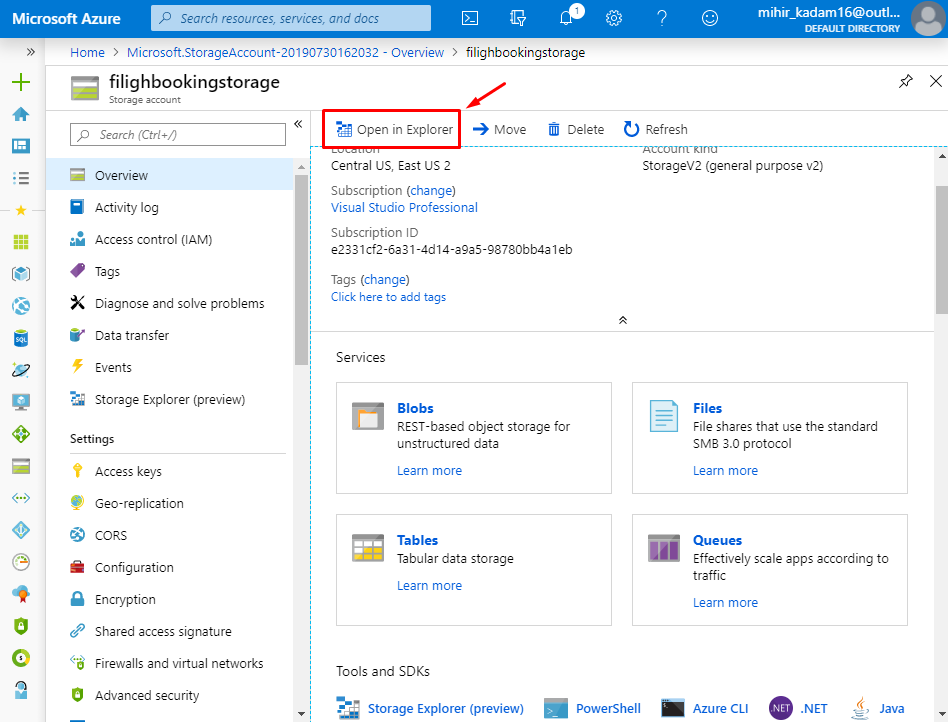
7. To manage this service, Let’s open in Storage Explorer.
Click on Open Storage Explorer.
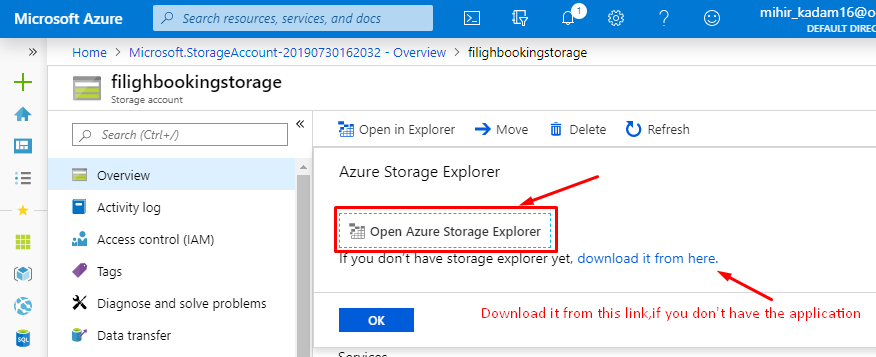
It will navigate to another tab, kindly allow Browser to Open the application.

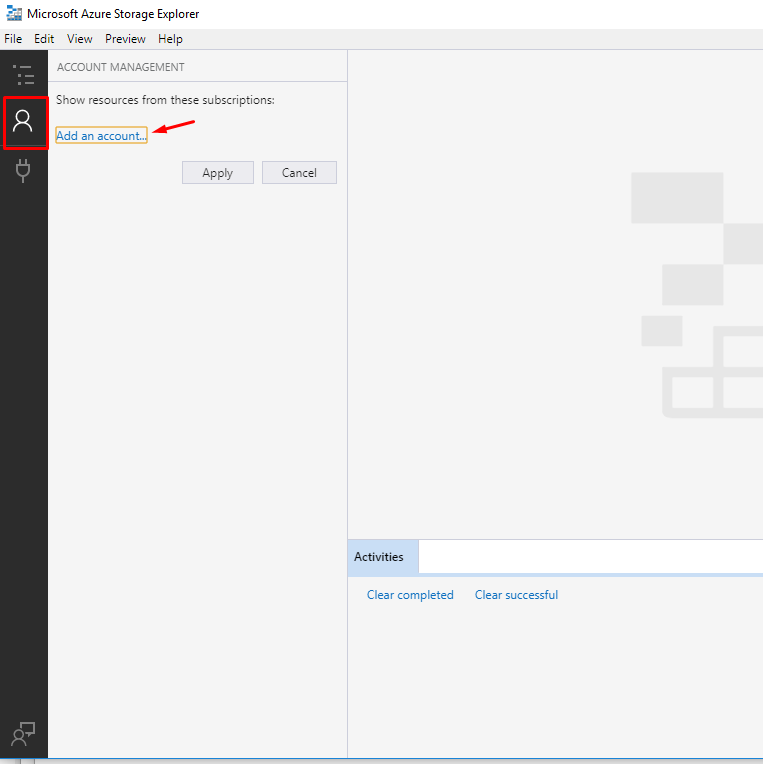
It will open the Storage Explorer Application on your local machine. Click on Add an account.
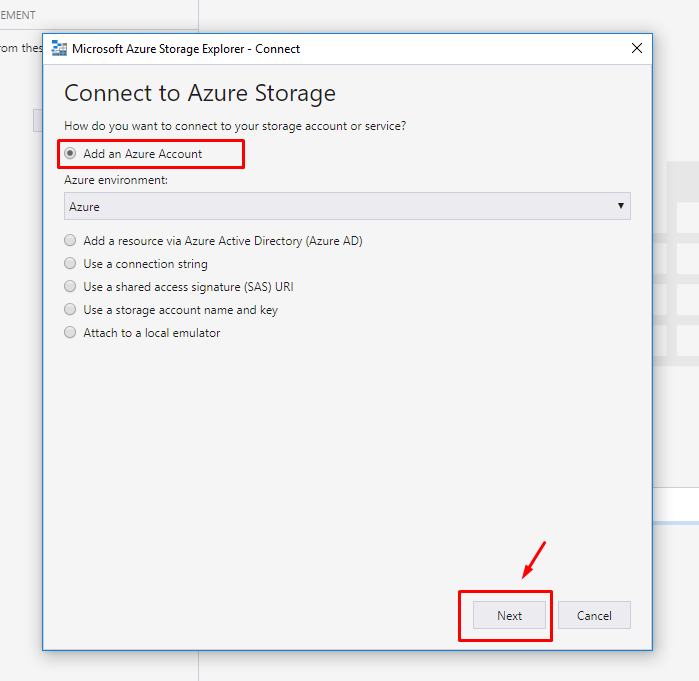
Select Add an Azure Account then click on Next.
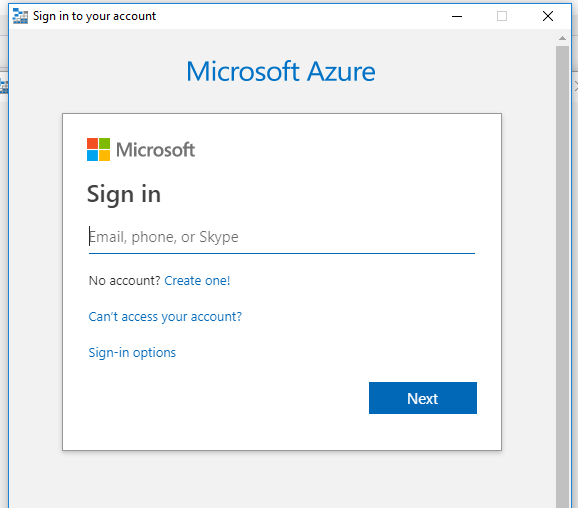
Enter the credentials.
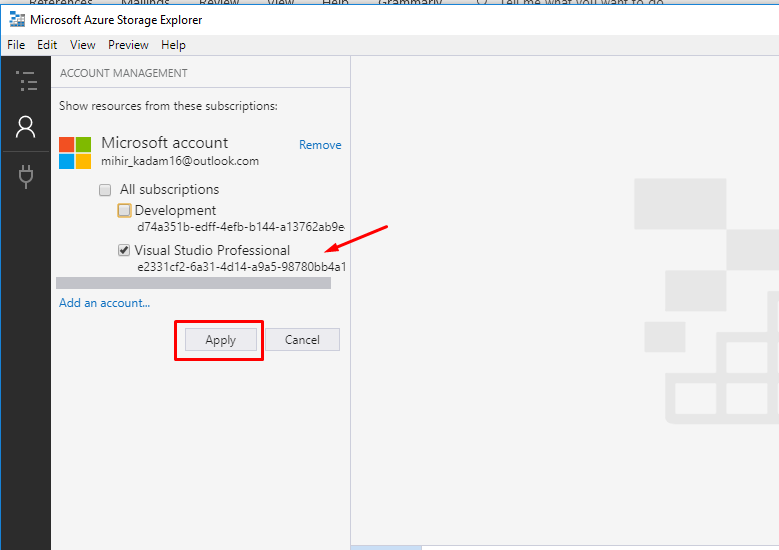
If you have multiple subscriptions, kindly select an appropriate one and click on Apply.
Select the storage account.
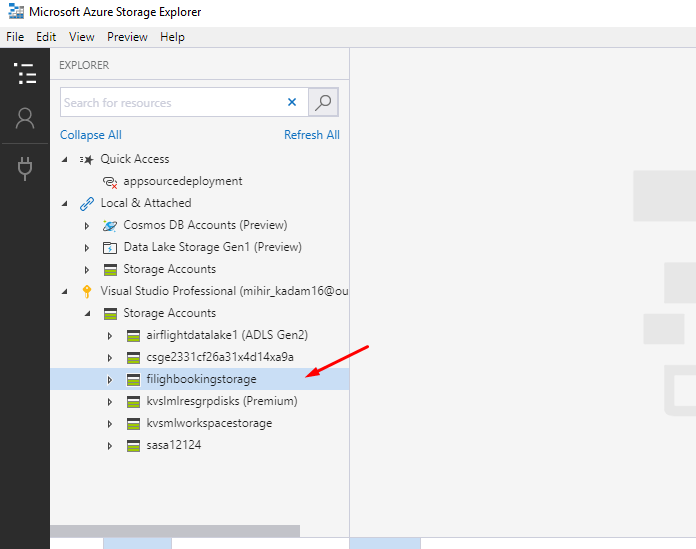
Expand the storage account to view all the services.
Click here to learn about these services.
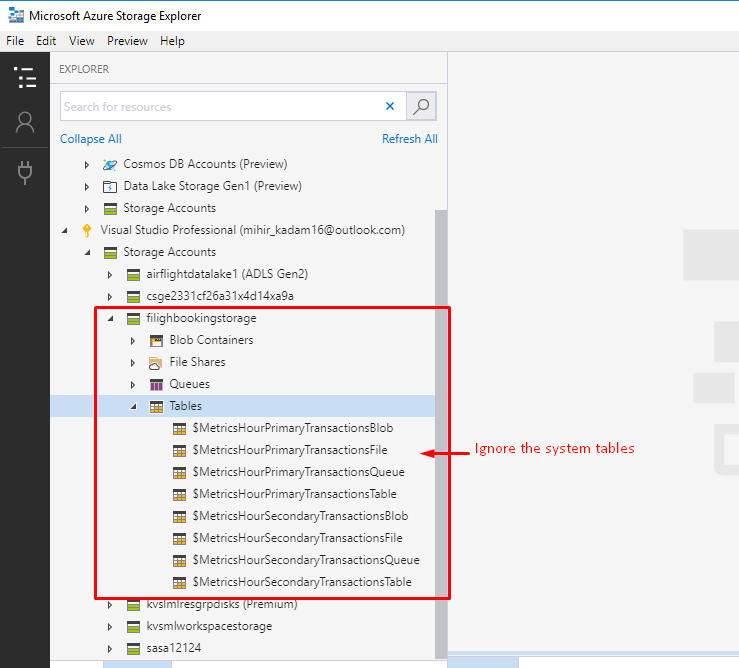
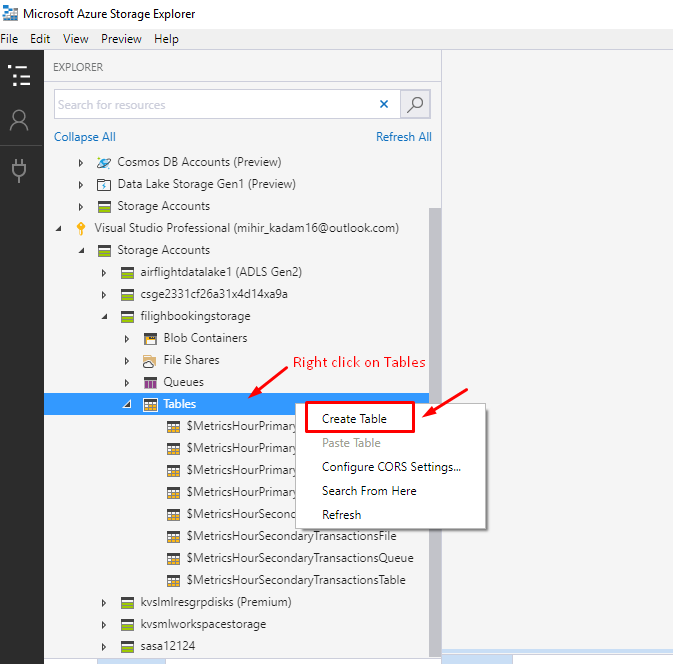
Let’s see how to create a new table and import the data using CSV.
Right click on Tables and click on Create Table option
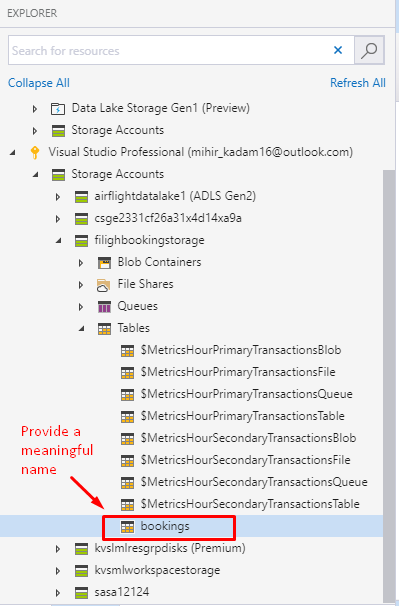
Provide a name for the table.
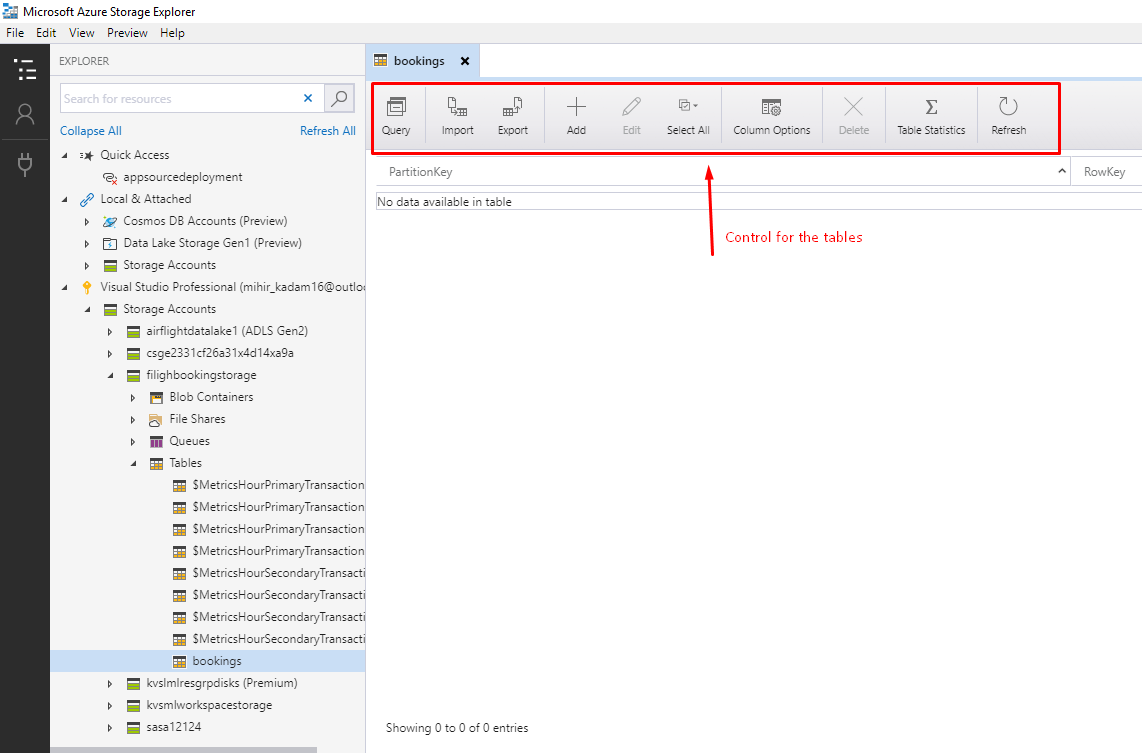
Controls for the tables given at the top.
Steps for sample CSV Import:
Let’s see how to import a CSV file into Table storage.
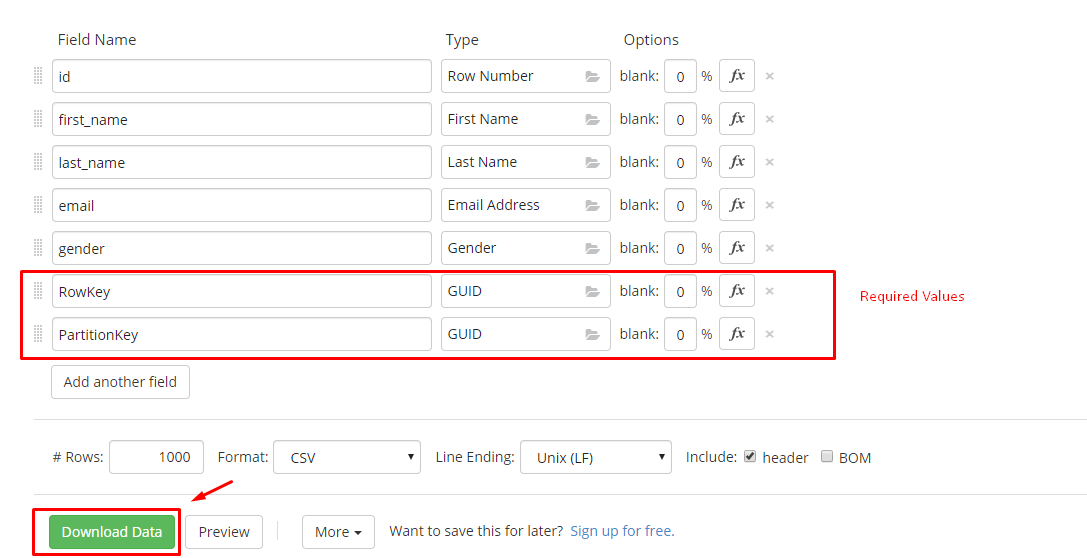
1. Create a CSV file or Generate dummy data. (https://mockaroo.com/)
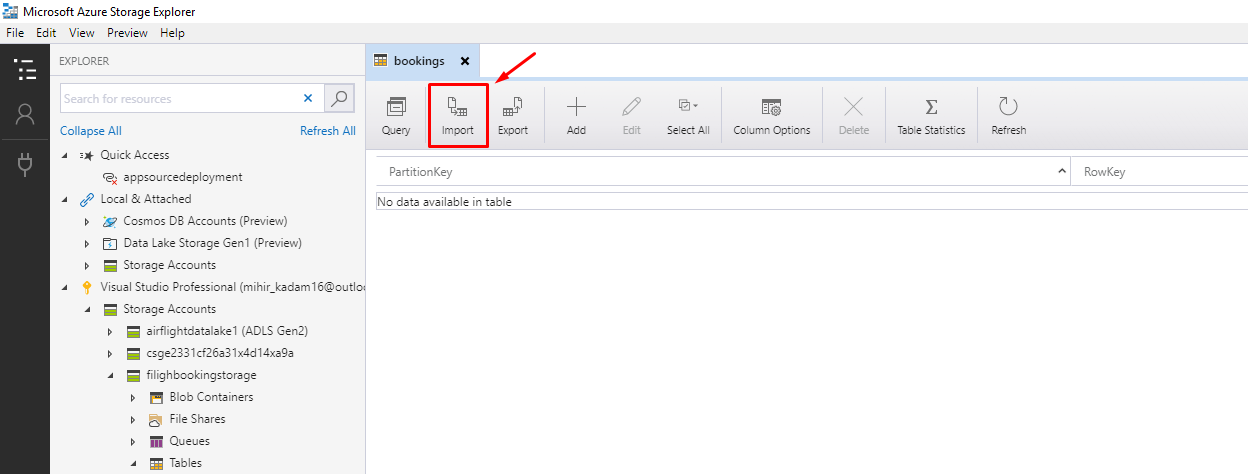
At the Top Menu, Click on Import Icon and Select the CSV file.
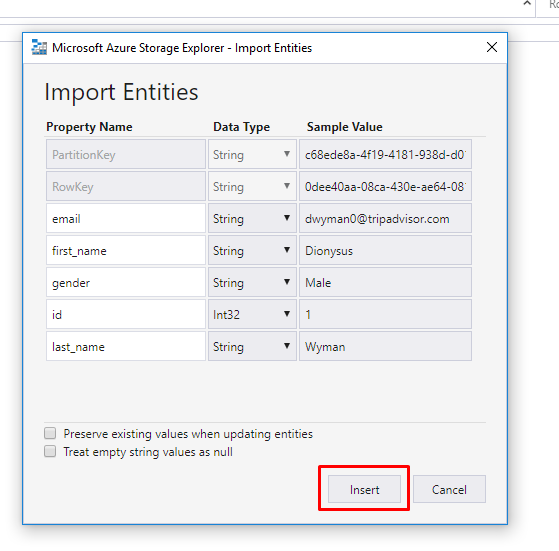
Review the data and click on Insert button.
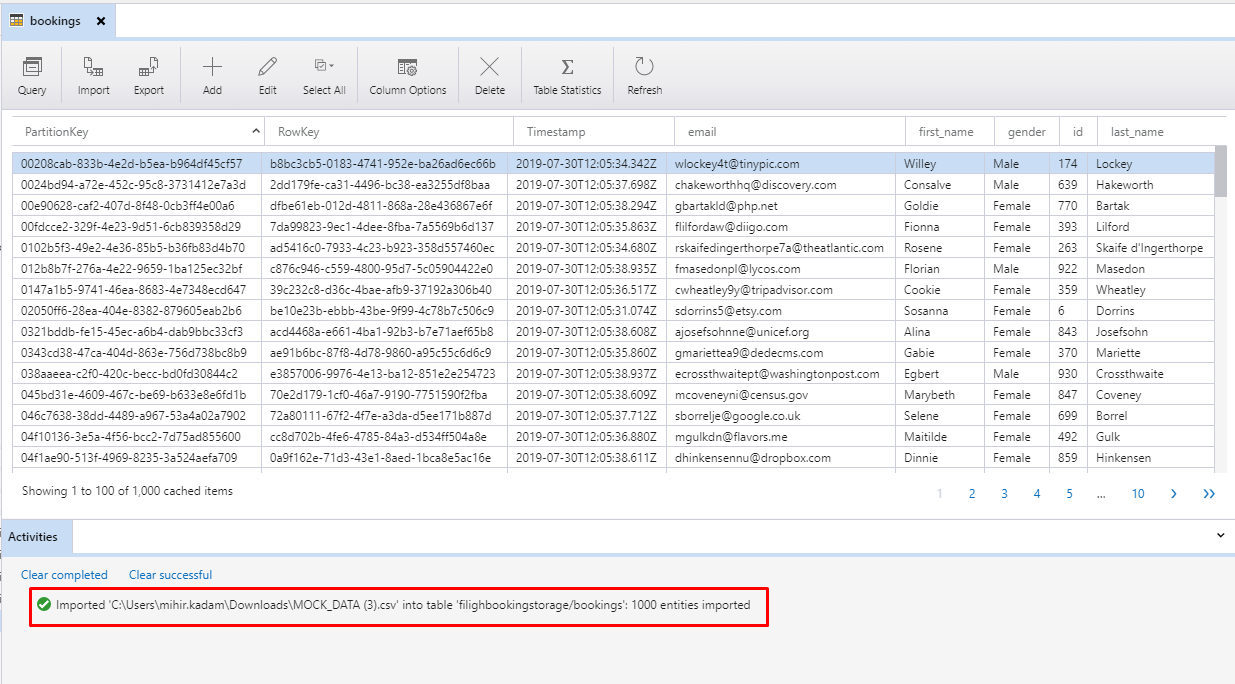
In the Activities Section, Monitor the CSV file progress.

Endpoints for Storage Account:
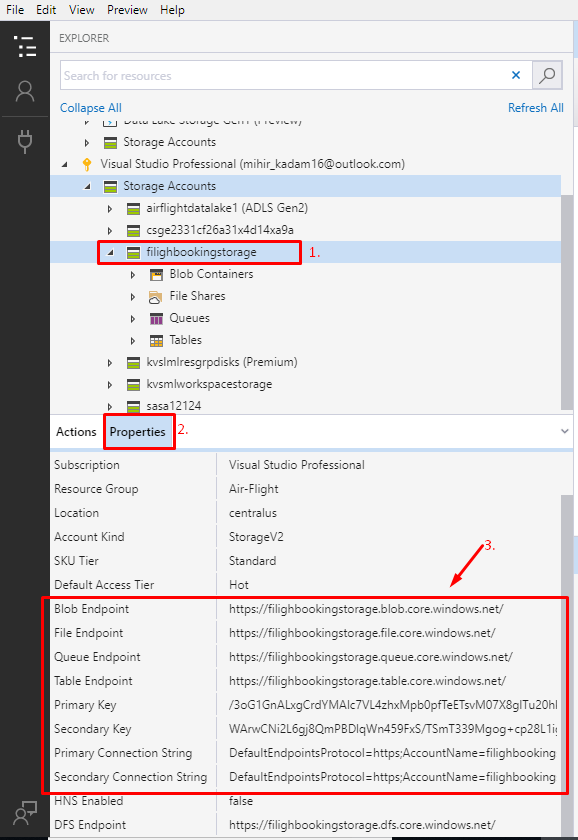
1. In Storage Explorer, Select the storage account and click on Properties.
You will see all the endpoints, primary key, and connection string information.
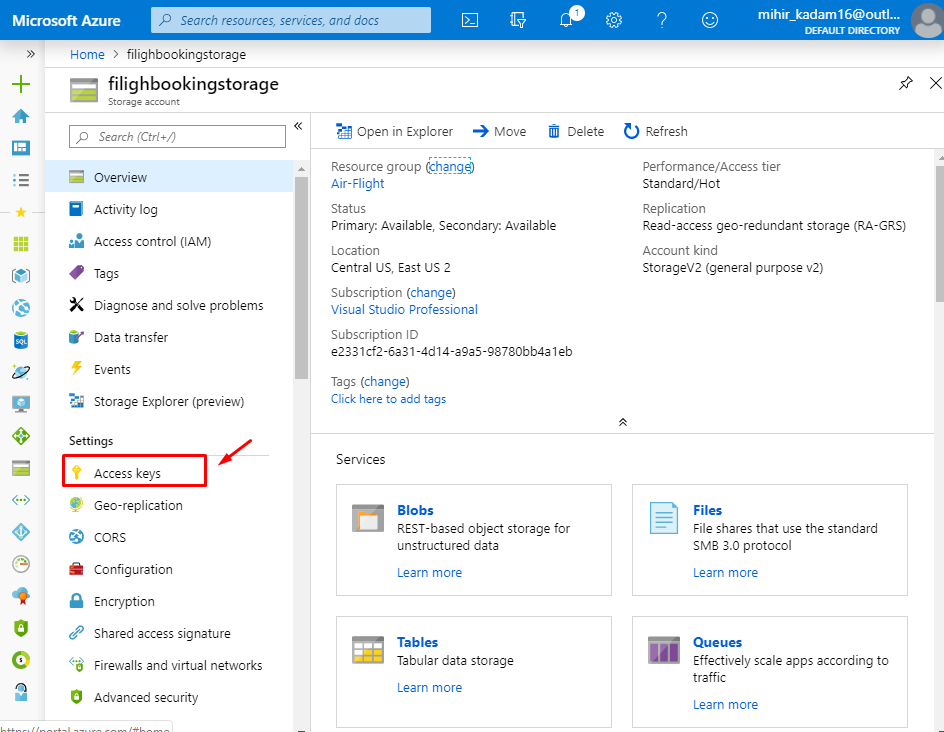
2. Switch the window and go to Azure Portal.
Open the particular Storage Account and find the Access Keys option.
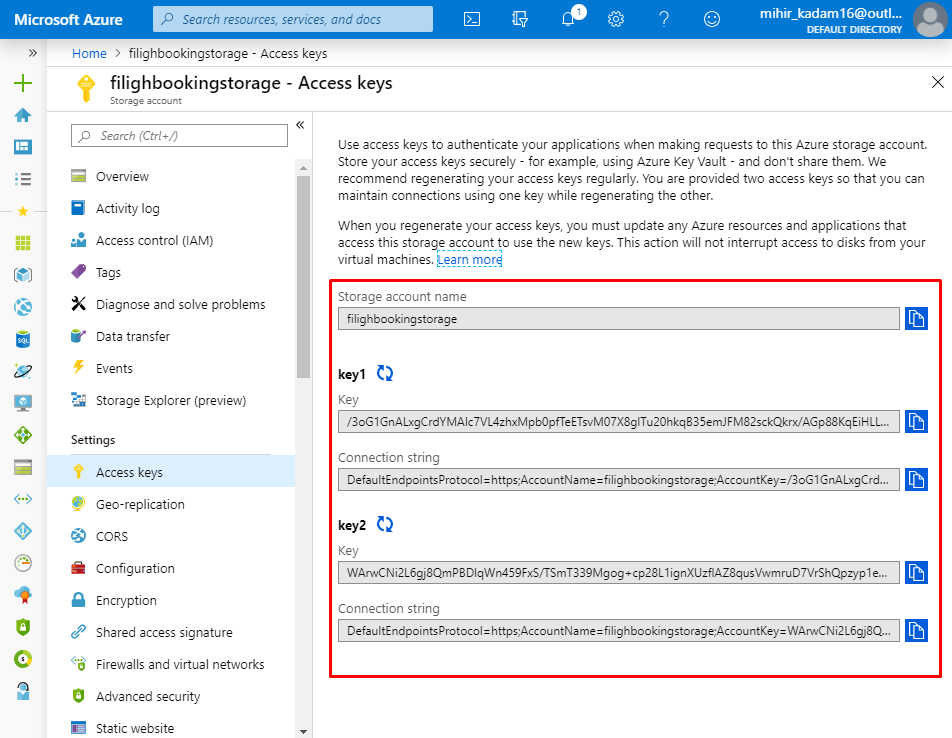
You will see all the information required to connect the storage account from external application.
References:
1. https://docs.microsoft.com/en-us/azure/storage/common/storage-account-overview
2. https://azure.microsoft.com/en-in/pricing/details/storage/
3. https://azure.microsoft.com/en-in/pricing/details/storage/tables/


