

Welcome to the third blog in our blog post series on Creating smart Apps with PowerApps and Microsoft Q&A Maker. We’ve so far created the BoT Service at Build the Bot service – QnA Maker and also created a custom connector API at Build the Custom Connector API.
Let’s now create a mobile App that can query the custom API. We will use a Flexible Gallery to display the query and results from the interactions.
Launch PowerApps Studio on web or on Windows. Make sure the Studio is connected to the same environment where the custom connection has been deployed earlier.

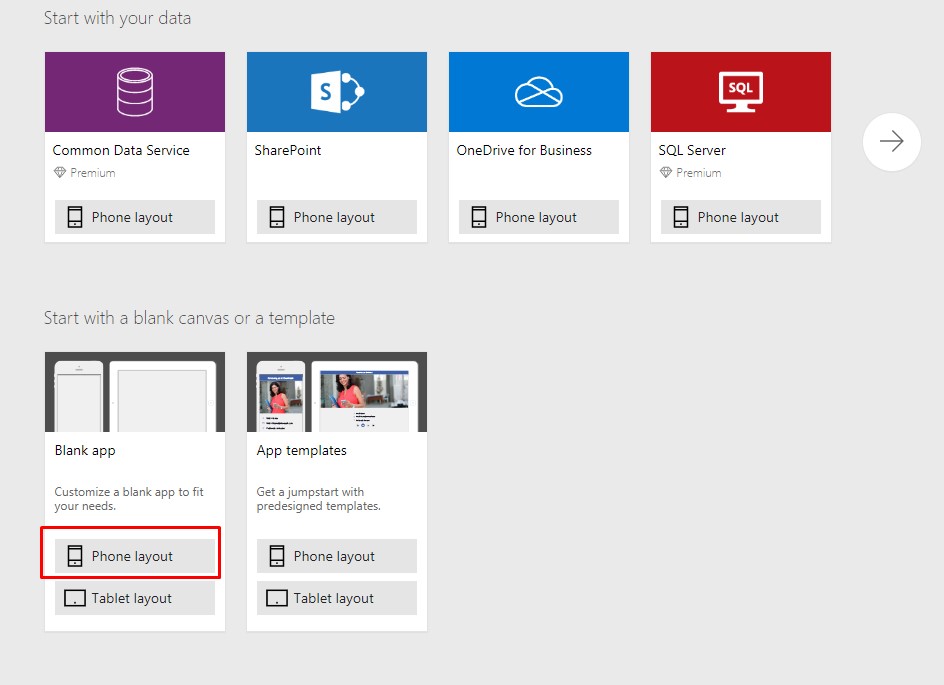
Create a new Blank App – Phone layout.
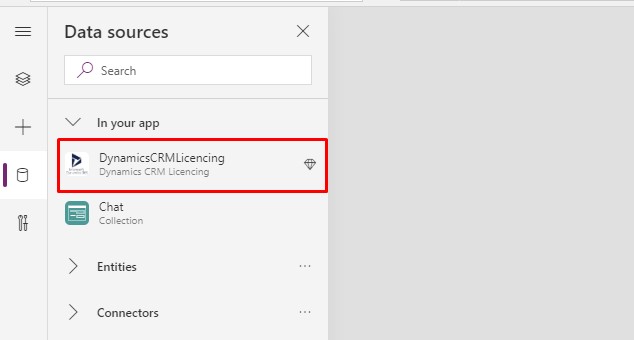
From the ribbon menu choose View > Data sources. In the right panel choose Add data source.
Choose the PowerApps Bot connection created earlier.
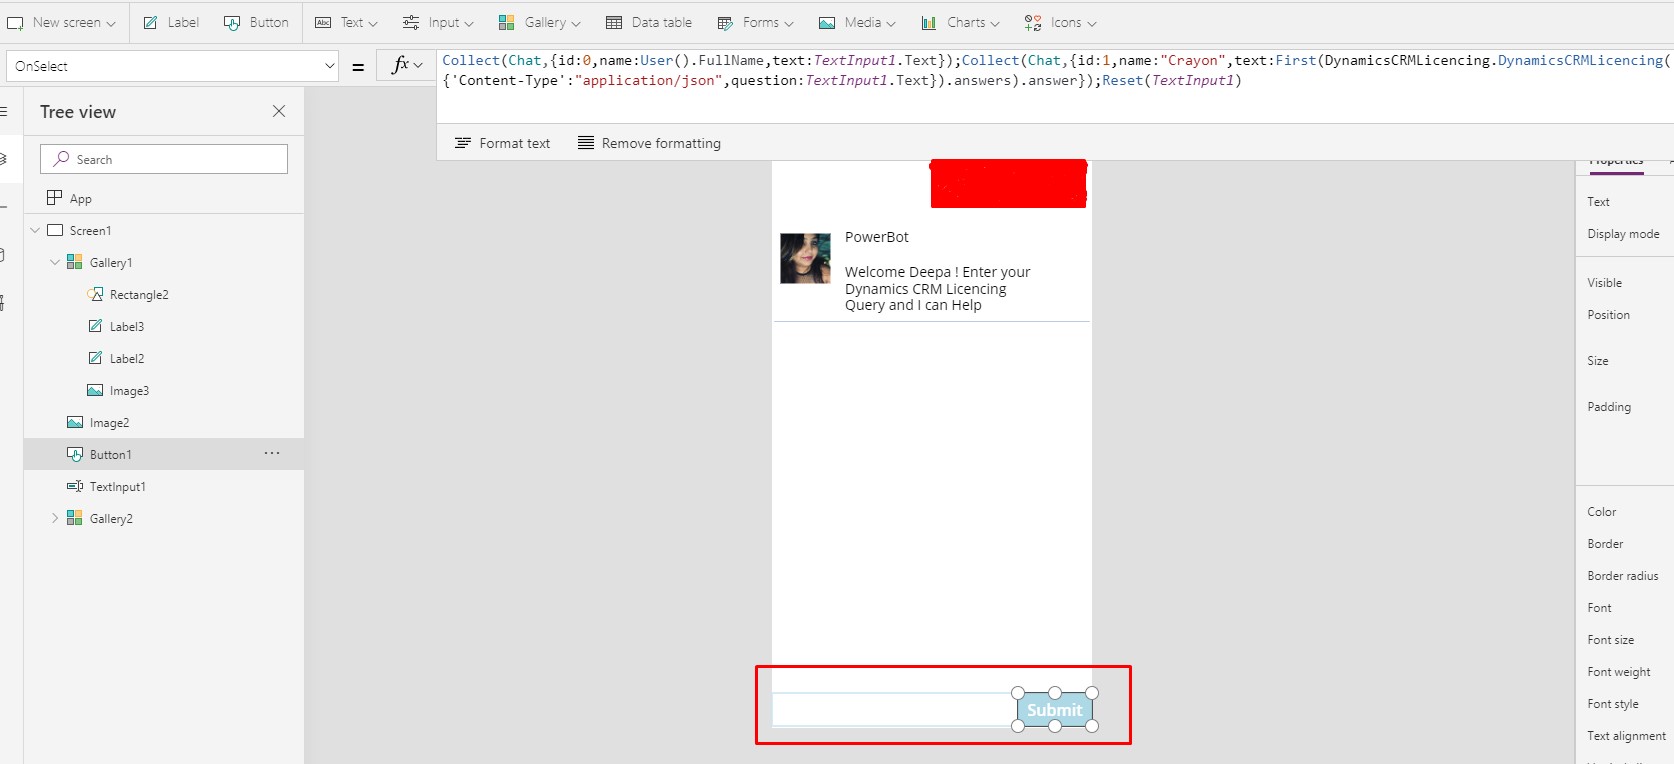
Now let’s bind the content of the QnA to a collection. Create a Collection chat to hold the conversation. Use an id field to indicate whether the content is from the user or the Bot. Set the OnStart of App.

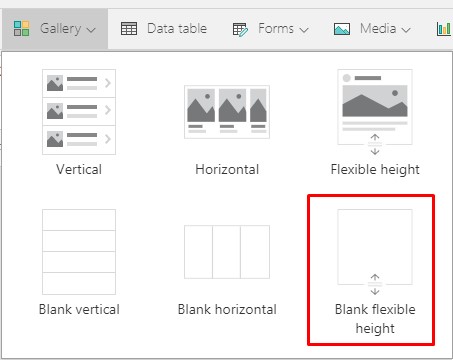
Add a Vertical Fexible Gallery from Insert option in ribbon menu. Set the Items property of the Gallery to chat. Set the Title to name field in the Collection and the Subtitle to text field. The Gallery will hold the chat conversations.
From the File > Media option, upload an image for the Bot using the Browse option.
Map the Gallery image to show either the Bot or the image of the user using the following expression:
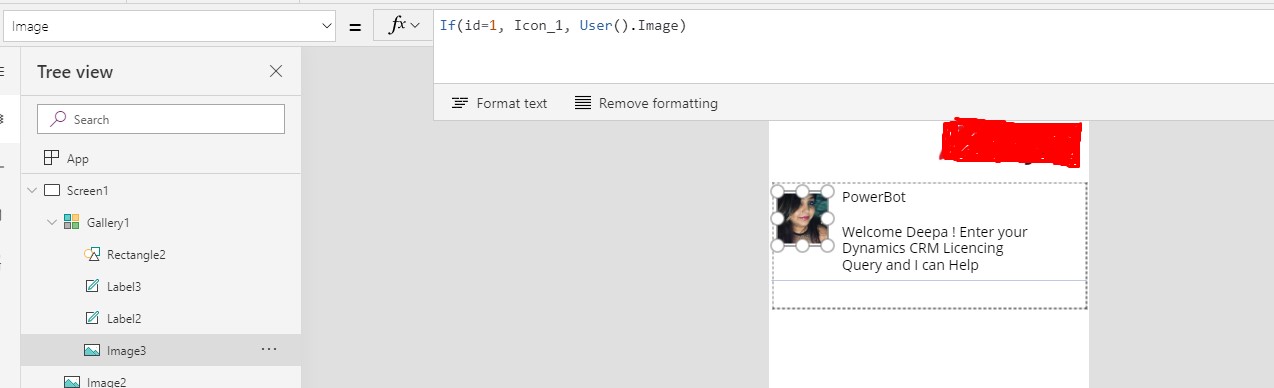
Use the same logic to set the X position of the image. The images need to be on the extreme left or right, in my example, I set X of the image 0 and 500.

For Text controls, set the Align property to Left or Right depending on whether the content is from the Bot or the user. To adjust the length of the text fields use the same condition to adjust the Width and the X properties of the text controls.

Add a Text Input and Button below the Gallery. Set the Button OnSelect to submit information to the Bot service and update the Collection
Test the App
Here is how the final App looks like. Publish the App once your changes are done and its ready to be used by your customers to get answers to their product queries!