Introduction:
In this blog, we will see Introduction, components and Setup for the Azure Data Factory.
Pre-requisites:
1. Azure Subscription with Contributor role. Click here to learn how to assign a role to the user.
2. Basic knowledge of Azure Services.
Description:
Data Factory allows us to connect online/on-premise services and migrate data from one end to another. It is mainly used to perform Extract, Transform and Load Operations. User can schedule the task to run on a specific time.
Official Definition
The Azure Data Factory service is a fully managed service for composing data storage, processing, and movement services into streamlined, scalable, and reliable data production pipelines.
Data Factory Components

1. Connection
Linked Services:
Linked services are much like connection strings, which define the connection information that’s needed for Data Factory to connect to external resources.
Think of it this way: a linked service defines the connection to the data source, and a dataset represents the structure of the data.
The following are the list of services supported by Azure Data Factory.
https://docs.microsoft.com/en-us/azure/data-factory/concepts-datasets-linked-services#dataset-type
Integration Runtimes:
Integration Runtime is the native compute used by ADF to execute or dispatch activities. Choose what integration runtime to create based on the required capabilities.
https://docs.microsoft.com/en-us/azure/data-factory/concepts-integration-runtime
2. Datasets: Select the table/container name of the linked service.
3. Pipeline: Logical container to perform a sequence of activities. Example Copy Activity and Calling an Azure function.
4. Activity: Activities represent a processing step in a pipeline. For example, you might use a copy activity to copy data from one datastore to another data store.
Let’s learn how to set up Azure Data Factory and its components with the simple Data Migration example between Azure table storage.
Steps to Setup:
1. Login to Azure Portal.
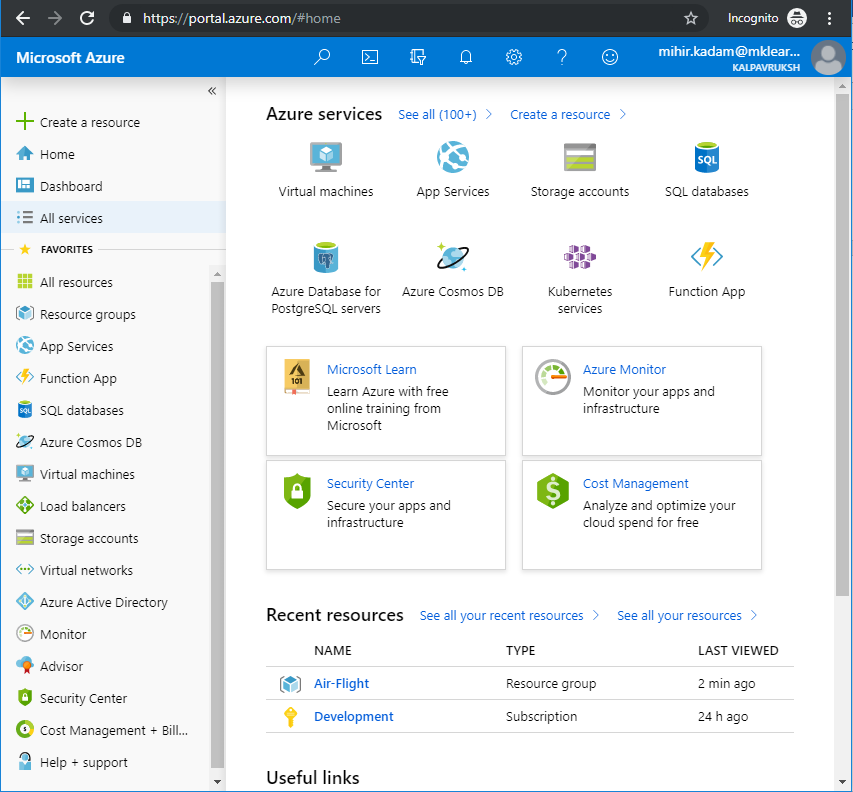
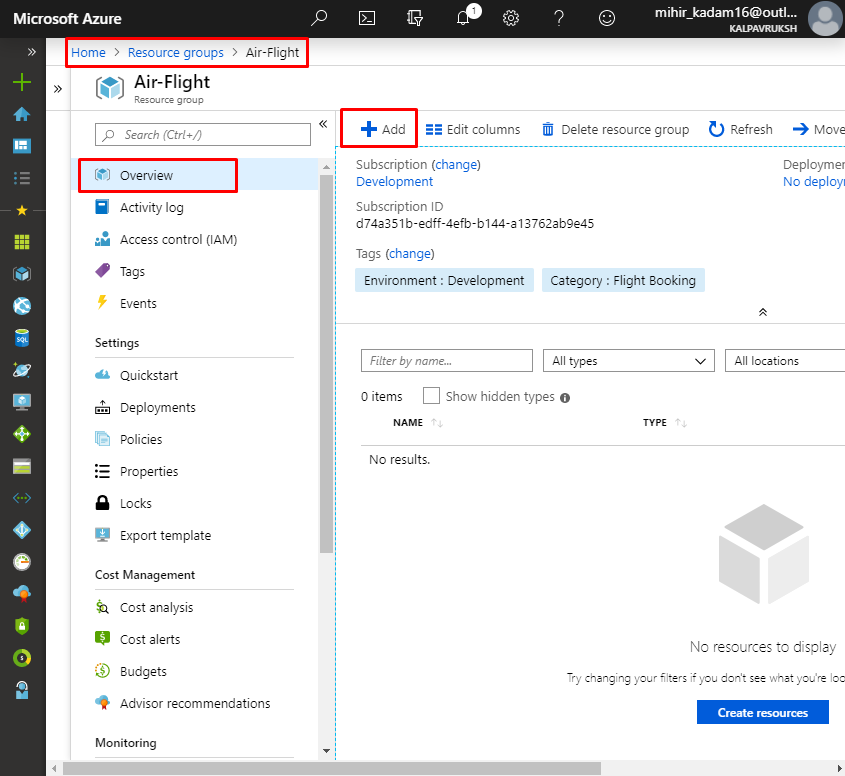
2. Create a New Resource Group or Select an Existing Resource Group.
Please find the link on how to create a new Resource Group.
3. Click on + Add Sign.
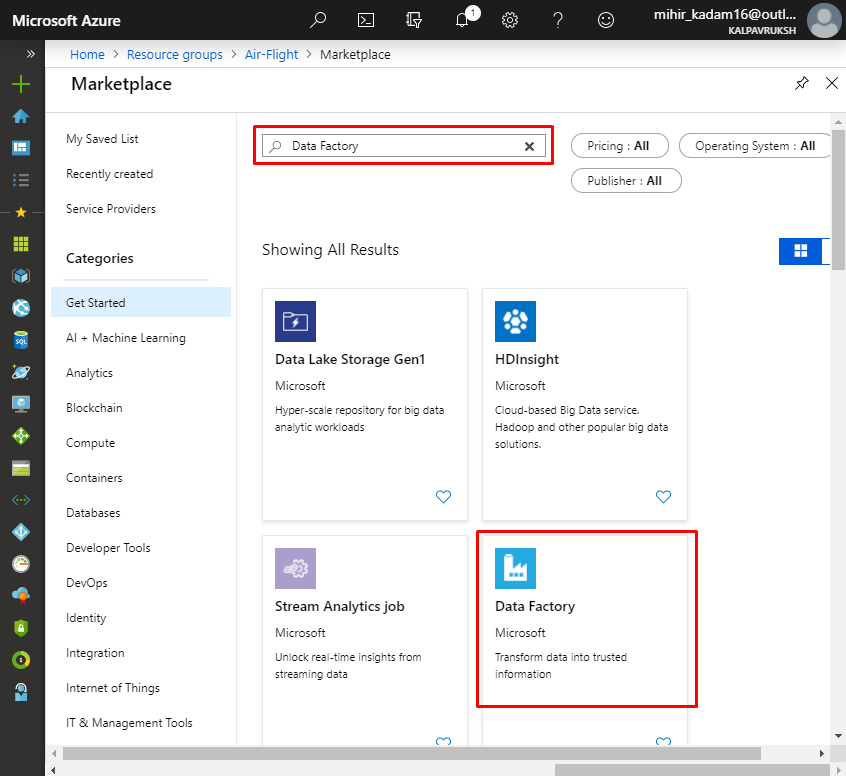
4. In the Search box type Data Factory.
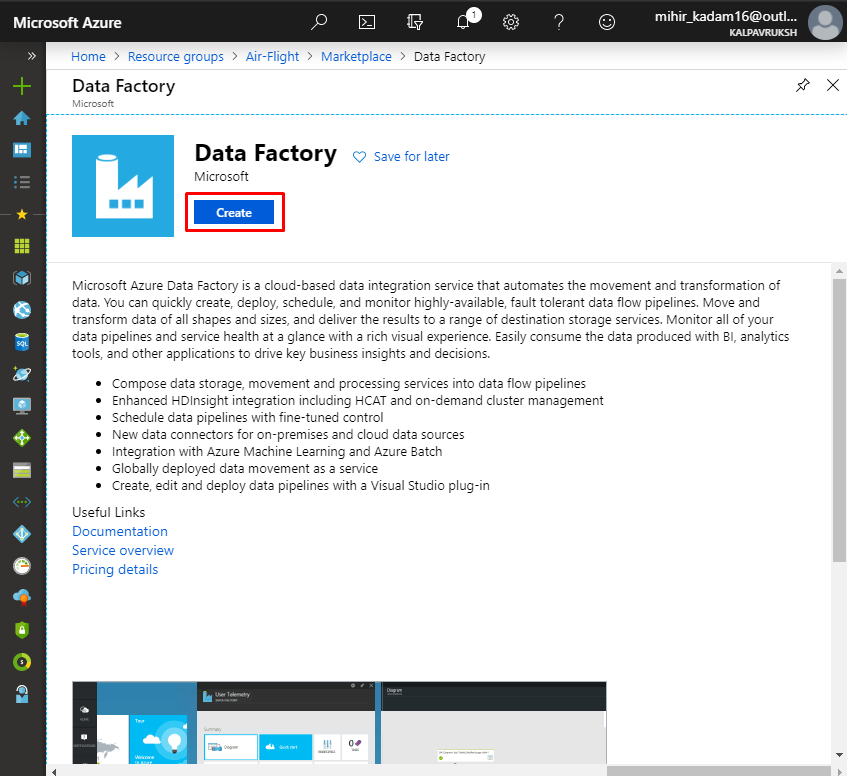
5. Click on Create button.
6. Enter the Basic Details and click on Create button.
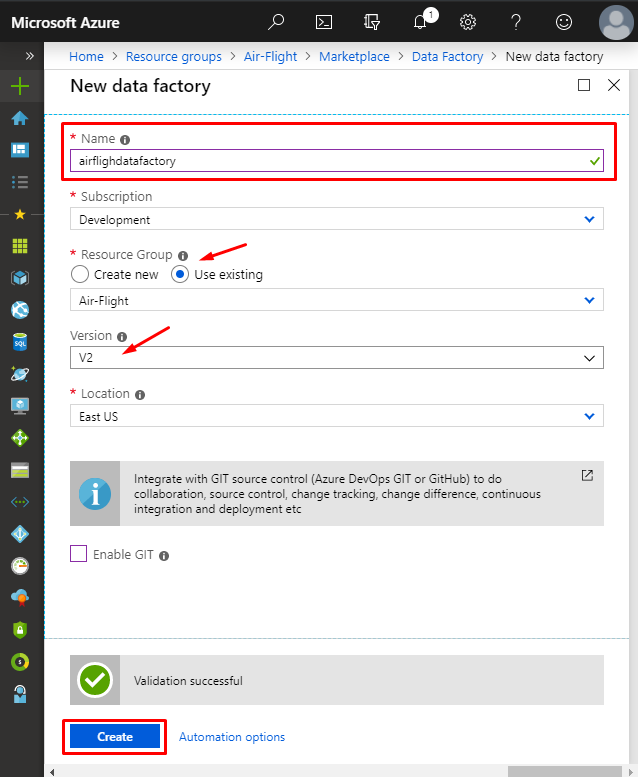
Name: A meaningful name for the Azure Data Factory.
Subscription: Select the appropriate subscription.
Version: Select the latest version.
Location: Select the solution which is near to your other Azure Services/On-Premise services.
Enable GIT: This is optional. Integrate your Data Factory with GIT, you can remove the GIT association anytime from the Data Factory portal.
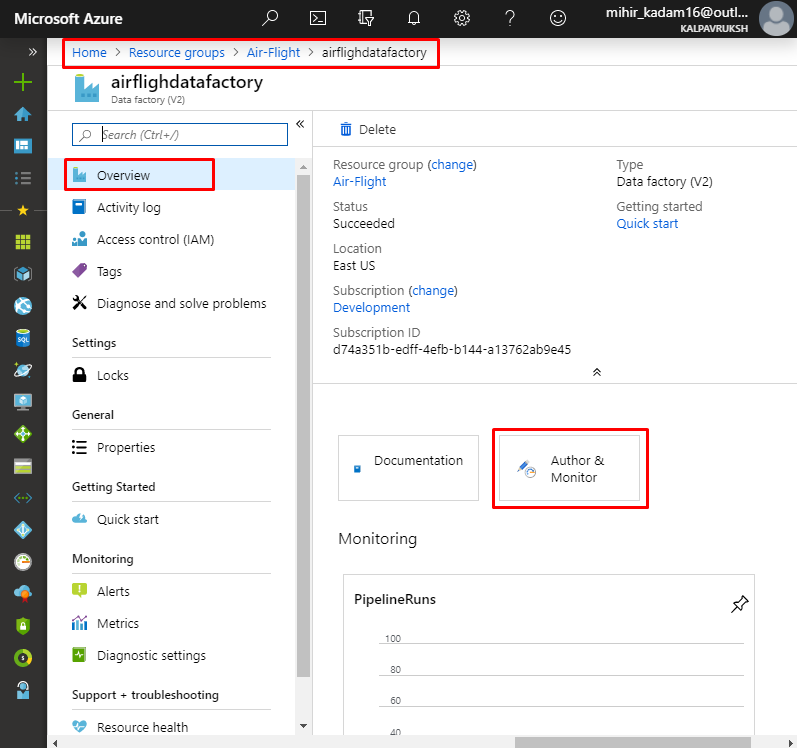
It takes a few minutes to create the account. You’ll see a message that states Your deployment is underway. Click on Go to Resource when deployment is completed.
7. From the left panel, select Overview and click on “Author & Monitor” option.
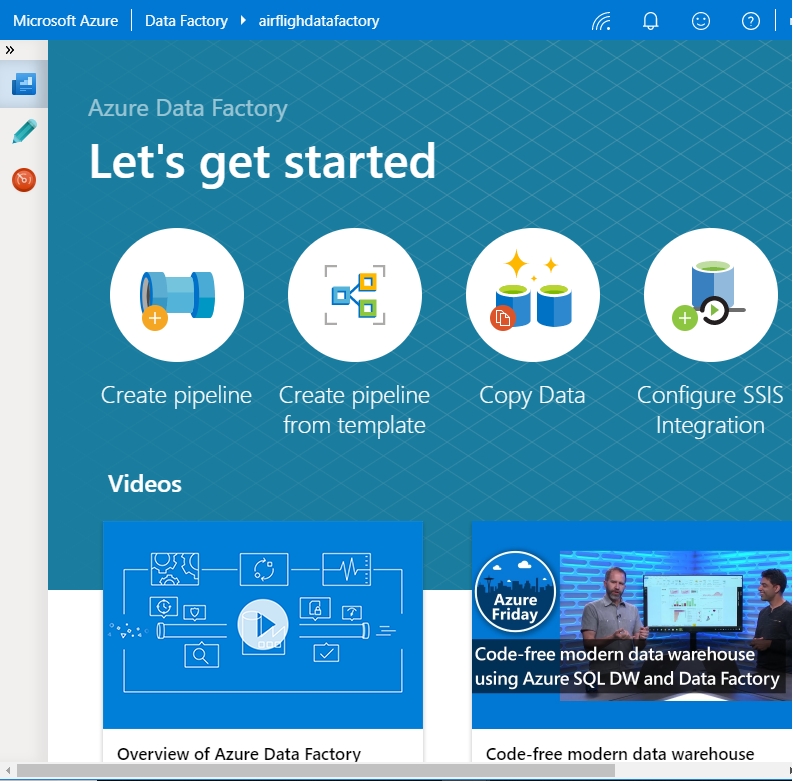
Azure Data factory has been successfully setup.
References:
https://docs.microsoft.com/en-in/azure/data-factory/introduction
https://azure.microsoft.com/en-in/services/data-factory/


